
I still remember the first time I tried starting lotus seeds in an old plastic tub on my back patio. I’d read that lotus were “easy” to grow from seed, tossed a handful of rock-hard seeds into water, and waited three weeks for absolutely nothing to happen. Turns out lotus seeds have a coat so tough it can keep them viable for centuries in mud, which is amazing for nature but frustrating when you actually want flowers this summer.
Once I figured out the trick — literally cracking that shell open the right way — I had sprouts within four days and blooms by midsummer. If you’ve got a backyard pond, a half-barrel water garden, or even just a sunny patio and a big plastic tub, growing lotus (Nelumbo nucifera or Nelumbo lutea) from seed is genuinely one of the most satisfying projects you can take on.
Here’s exactly how I do it, from scarifying that stubborn seed coat to getting a young plant settled into its permanent home.
Why Lotus Seeds Are Different From Most Seeds
Lotus seeds have a seed coat (the hard outer shell protecting the embryo inside) that’s nearly waterproof. In the wild, this shell can protect a seed at the bottom of a pond for years, even decades, waiting for the right conditions to sprout. That durability is great for survival but a real obstacle for home gardeners who want fast, reliable germination.
The seed coat won’t let water in on its own, so the embryo just sits there dormant no matter how long you soak it. That’s why every successful method for growing lotus from seed starts with scarification — deliberately damaging the shell so water can finally reach the embryo inside. Skip this step and you can wait months for nothing.
Pro Tip: I’ve found that the seeds which sprout fastest are the ones with a visibly darker, almost black shell. Lighter brown seeds are often immature and take longer, or don’t germinate at all.
Step 1: Scarify the Seed Coat
Grab a metal file, a small hand saw, or coarse sandpaper. Find the blunt, rounded end of the seed (the pointed end holds the embryo, so avoid that side). Carefully file or sand down a small spot on the blunt end until you see a lighter tan or white layer underneath — that’s the endosperm, and once you spot it, stop.
You only need to go through the outer black shell, not deep into the seed itself. I’ve nicked the embryo before by getting overeager with the file, and that seed never sprouted. Work slowly and check your progress every few strokes.
If you’re growing lotus varieties suited for smaller setups, this same scarification process applies whether you’re planning a full backyard pond or one of the more compact lotus varieties for small backyard ponds.
Step 2: Soak the Seeds
Fill a clear glass jar or bowl with room-temperature water, around 70 to 80 degrees Fahrenheit. Drop your scarified seeds in and set the jar somewhere warm with bright, indirect light — a kitchen windowsill works fine. Change the water daily to prevent bacteria and mold from building up, which can rot the seed before it even sprouts.
Within 3 to 7 days, you’ll see the seed swell and a small green or reddish shoot emerge from the scarified spot. This is the moment that hooked me on growing lotus — it’s fast, visible progress that most seed-starting projects just can’t match. Some seeds send out a tiny root first, others push out the leaf shoot; both are normal.
Pro Tip: In my experience, seeds that don’t show any swelling within 7 days usually weren’t scarified deeply enough. I just re-file them lightly and drop them back in fresh water rather than giving up.
Step 3: Let the Seedling Develop Floating Leaves
Once your shoot is 2 to 3 inches long with a couple of small round leaves, keep it in that same jar or move it to a slightly larger clear container. Don’t rush to plant it in soil yet. The seedling needs to develop a proper root system and a floating leaf on the water’s surface first, which usually takes another 1 to 2 weeks.
Keep the water shallow, just 3 to 4 inches deep, and maintain that same warm temperature range. This mimics the shallow pond margins where lotus naturally germinate in the wild. If the water gets cloudy or smells off, swap it out completely rather than topping it up.
Step 4: Transplant Into Growing Containers
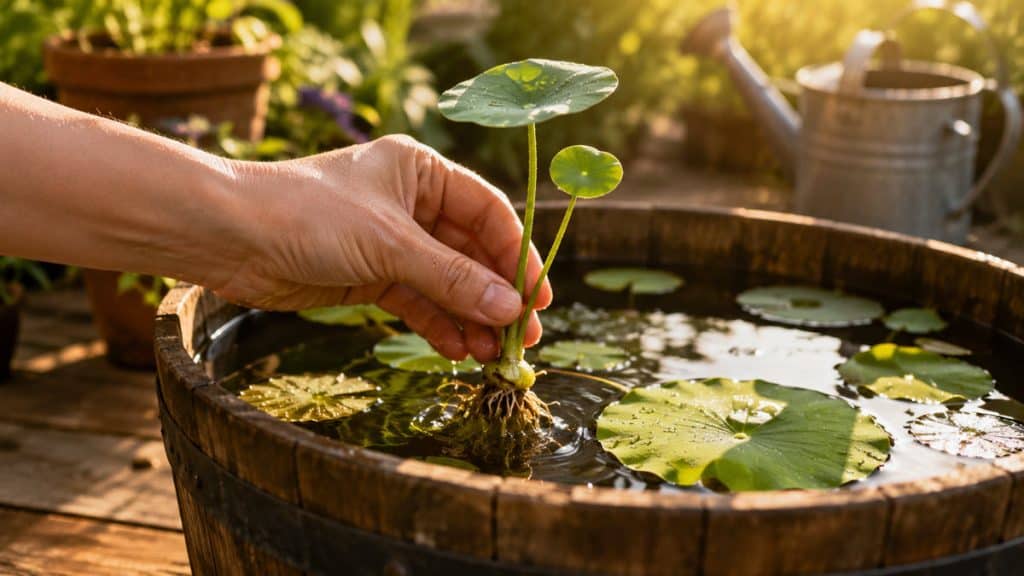
Once you’ve got a strong root and at least one aerial leaf standing above the water, it’s time to move the seedling into its growing container. Lotus don’t actually need soil to sprout and grow initially — if you’re curious about that approach, I’ve covered it in detail in how to grow lotus without soil at home. But for long-term growth, a heavy clay-based aquatic soil works best.
Use a container without drainage holes, since lotus are aquatic plants that live in standing water. A 5-gallon bucket works for a dwarf variety, while standard lotus need at least 15 to 20 gallons of root space. Pack 4 to 6 inches of heavy clay loam or a specialized aquatic planting mix into the bottom, gently nestle the tuber and root horizontally with the growing tip angled upward, and cover lightly with soil while leaving the growing tip exposed.
If you’re working with a container garden instead of an in-ground pond, check out my notes on whether lotus plants can grow in clay soil containers — clay-heavy soil actually mimics natural pond mud better than lighter potting mixes.
Step 5: Add Water Gradually
Don’t flood the container immediately. Add just 1 to 2 inches of water above the soil line at first, then slowly increase the depth over 2 to 3 weeks as the plant grows more leaves. By the time the plant is established, most lotus varieties want 6 to 12 inches of water above the crown, though this depends on the specific variety you’re growing.
I always recommend checking how deep to plant lotus in garden ponds before finalizing your setup, since depth requirements shift depending on whether you’re growing a dwarf bowl lotus or a full-size pond variety. Getting this wrong is one of the most common reasons new growers see stunted plants that never produce a bloom.
Step 6: Give It Full Sun and the Right Temperature
Lotus are sun-hungry plants. They need at least 6 hours of direct sunlight daily, and ideally closer to 8, to produce flowers rather than just leaves. If you’re wondering whether your plant is getting enough light, I go into more depth in do lotus plants need full sun.
Water temperature matters just as much as air temperature. Lotus thrive when water stays between 75 and 85 degrees Fahrenheit through the growing season. In cooler regions, dark-colored containers help absorb heat and keep the water warmer, which speeds up growth considerably.
Step 7: Feed the Plant Once It’s Established
Wait until your lotus has at least 4 to 5 mature leaves before adding any fertilizer. Feeding too early can burn the tender new roots. Once established, use an aquatic plant fertilizer tablet pushed into the soil near the root zone, not dissolved into the open water, since that just feeds algae instead of your plant.
For a full breakdown of timing and product types, my guide on lotus plant fertilizer recommendations for USA water gardens walks through exactly what I use in my own tubs each season. Good water quality matters just as much as fertilizer, so it’s worth reviewing the water quality requirements for lotus plants too.
Things to Keep in Mind
- Scarify carefully, not aggressively. Filing too deep damages the embryo and kills the seed before it even gets a chance to sprout.
- Match your climate to your variety. Some varieties handle cooler zones better than others, so check what zone do lotus plants grow best before choosing seeds.
- Watch for yellowing leaves in midsummer. This is often a nutrient or water quality issue, not a disease — see why are my lotus plant leaves turning yellow in summer for troubleshooting.
- Protect young seedlings from wildlife. Raccoons, birds, and even curious pets can disturb floating seedlings before roots take hold; my guide on protecting lotus plants from American wildlife pests covers simple barriers that work.
- Keep pets in mind around water gardens. If you have cats that like to explore container gardens, it’s worth knowing whether lotus plants are poisonous to cats.
- Give it time before judging bloom failure. Seed-grown lotus often take a full growing season, sometimes two, before flowering; don’t assume something’s wrong if you only get leaves the first year.
Frequently Asked Questions
How long does it take for lotus seeds to germinate?
Once properly scarified, lotus seeds usually swell and sprout within 3 to 7 days in warm water. Seeds that aren’t fully scarified can take weeks or may never sprout at all.
Do lotus seeds need to be soaked before scarifying?
No, scarify first, then soak. Soaking an intact seed coat does nothing since water can’t penetrate the shell until it’s been filed or nicked open.
Can I grow lotus from seed in a small container?
Yes, dwarf lotus varieties do well in containers as small as 5 gallons. For apartment or patio growing, check out my DIY lotus container garden for apartment balconies for a compact setup that still produces blooms.
Why did my lotus seedling die after transplanting?
The most common cause is adding too much water too fast, which can drown a young root system before it’s established. Increase water depth gradually over several weeks rather than filling the container all at once.
How many years until a lotus grown from seed flowers?
Most seed-grown lotus bloom in their second year, though some vigorous varieties flower in year one under ideal warm, sunny conditions. Cooler climates or shorter growing seasons often push first blooms to year two or three.
Can I grow lotus indoors from seed during winter?
You can start seeds indoors in a warm, sunny spot, but full growth and flowering really need outdoor conditions. If you’re in a colder region, my guide on indoor lotus growing techniques for US winter months covers how to overwinter young plants successfully.
Growing lotus from seed comes down to breaking through that tough seed coat, giving the seedling warm shallow water while it establishes, then gradually deepening its home as it matures. Get the scarification and water timing right, and you’ll go from a rock-hard seed to a blooming pond centerpiece in a single growing season. I hope you found this article helpful.
You May Also Like
- Sacred Lotus vs American Lotus: What’s the Difference
- Companion Plants for Lotus
- Lotus Flower Growing Season in Different USA Regions
- How to Grow a Lotus Flower in a Bowl
- Why Is My Lotus Plant Dying

Hello there! I’m Elsa, and gardening is my passion. As an avid gardener, I created GardeningElsa.com to share my knowledge and experience with fellow enthusiasts. My website is a comprehensive resource for gardeners of all levels, offering expert advice on a wide range of topics, including plants, flowers, herbs, and vegetable gardening. Whether you’re a beginner looking to start your first garden or a seasoned pro seeking to expand your knowledge, GardeningElsa.com has something for everyone. Read more about me.
