
Self-watering pots work best for houseplants that like evenly moist soil, such as peace lilies, ferns, African violets, pothos, and leafy herbs. They hold water in a hidden reservoir and let the soil pull it up as the roots dry.
That steady supply keeps thirsty plants from swinging between soggy and bone-dry.
My advice is to use a self-watering pot for moisture-loving tropicals and herbs, and keep succulents, cacti, snake plants, ZZ plants, and orchids in regular pots that dry out between waterings. Pick the wrong plant and the same reservoir that saves a fern will slowly rot a cactus.
How Do Self-Watering Pots Work?
A self-watering pot has a soil chamber on top, a water tank below, and a wick or soil column linking them. The soil draws water up as it dries.
That system can still leave roots too wet if the mix, plant, or refill habit is wrong.
The Reservoir, Wick, and Capillary Soil Column
The bottom chamber is the reservoir. It holds anywhere from a cup of water in a small desk pot to a gallon or more in a floor planter.
Water moves up through capillary action, the same pull that lets a paper towel soak up a spill. Some pots use a fabric or rope wick that hangs into the water.
Others have a small cup of potting mix that dips into the reservoir, so the soil itself does the wicking.
Two parts keep the roots healthy:
- The air gap. A small space separates the water from the bottom of the main soil. Roots sit in damp soil fed by the water. They should never sit in standing water.
- The overflow hole. This small hole at the top of the reservoir lets extra water escape if you overfill. Never plug it.
As the soil dries, it pulls harder on the water. As it gets wet, the pull slows. The plant takes up what it uses, and you refill the tank now and then.
Why a Reservoir Doesn’t Guarantee the Right Moisture Level
A full tank doesn’t mean the roots are getting the right amount of water. Dense, packed soil can stay soggy at the bottom and dry on top. A coarse, chunky mix can leave gaps around the wick so water barely moves.
Plant size changes things too. A small plant in a big pot can’t use much water, so the extra soil stays wet for days. A root-bound plant in a small pot can empty the tank fast and still wilt.
Light and season also shift the math. A plant near a sunny south window in July drinks far more than the same plant in a dim corner in January.
That’s why I treat the pot as a helper and still check the soil with my finger.
Which Indoor Plants Do Best with Steady Moisture?
Plants that wilt, crisp, or drop leaves when they dry out are the best match. Thirsty bloomers, ferns, and fast-growing vines and herbs all benefit from a steady supply.
Peace Lilies, Ferns, and African Violets
Peace lilies flop over dramatically when they get thirsty. They bounce back, but repeated droops stress the plant and cut down on blooms. A reservoir keeps the soil evenly damp so the leaves stay upright.

Keep in mind that peace lilies are toxic to cats and dogs, according to the ASPCA. They contain calcium oxalate crystals that irritate the mouth.
Ferns like Boston fern and maidenhair grow in forests where the soil rarely dries. Indoors, one missed watering can leave crispy brown tips.
A self-watering pot is one of the easiest ways I know to keep them lush. The ASPCA lists Boston fern as non-toxic to cats and dogs.
African violets hate cold water on their fuzzy leaves, which leaves spots. Watering from below fixes that problem. They do best with small reservoirs and a light, airy mix, since their roots are fine and shallow.
Pothos and Indoor Herbs
Pothos survives neglect, but it grows fuller vines and bigger leaves with steady moisture. It’s one of the easiest plants to start with. The ASPCA lists pothos as toxic to cats and dogs, so keep the vines out of reach.
Leafy herbs such as basil, mint, parsley, and chives grow fast and use a lot of water. On a sunny kitchen windowsill, a small reservoir keeps them from wilting between harvests.
Skip rosemary, lavender, thyme, and oregano here. These Mediterranean herbs like lean soil that dries out, and constant moisture weakens their roots.

Which Plants Should Stay in Regular Pots?
Plants that need their soil to dry out between waterings belong in regular pots with drainage holes. For desert plants, I like unglazed terracotta, since the clay lets moisture escape through the walls.
Succulents, Cacti, Snake Plants, and ZZ Plants
Succulents and cacti store water in thick leaves and stems. Their roots expect a soak followed by a long dry spell. Steady moisture from a reservoir leads to soft, mushy roots within weeks.
Snake plants and ZZ plants look like tropical foliage plants, but they’re built for drought. Snake plant has thick, water-storing leaves. ZZ plant grows from fat underground rhizomes that rot in wet soil.
If you already own a self-watering pot you love the look of, you can still use it for these plants. Leave the reservoir empty and water from the top only when the soil is fully dry.
ZZ plant isn’t on the ASPCA list, but it does contain calcium oxalate, so keep pets from chewing it.
Why Orchids Need a Different Watering Approach
Most common orchids, like the moth orchid (Phalaenopsis), grow on tree bark in the wild. Their roots cling to branches, catch rain, and then dry in the breeze.
That’s why indoor orchids grow in chunky bark or moss in pots with lots of holes. They need air around the roots and a wet-then-dry cycle. A wicking reservoir keeps the bark damp all the time, and the roots turn brown and mushy.
My advice is to soak orchids in a bowl of water for about 10 to 15 minutes, drain them fully, and wait until the bark is nearly dry before the next soak.
What Should You Look for in a Pot?
The right pot fits the plant’s root ball, shows you the water level, and lets extra water escape. Store shelves carry planters in every size and style, so it helps to know which features count before you buy.
Choose a Size That Fits the Roots
Pick self-watering planters only 1 to 2 inches wider than the current root ball. Too much extra soil around small roots stays wet for a long time.
Here’s how I’d match pot size to the plant:
| Plant size | Pot width | Reservoir size | Refill time indoors |
|---|---|---|---|
| Small plants (herbs, violets) | 4 to 6 inches | About 1 cup to 1 quart | Every few days to 1 week |
| Medium plants (pothos, peace lily) | 6 to 10 inches | About 1 quart to 1/2 gallon | Every 1 to 2 weeks |
| Large plants (big ferns, floor plants) | 10 inches and up | 1 gallon or more | Every 2 to 4 weeks |
Water is heavy. A gallon weighs about 8.3 pounds, so check that shelves and plant stands can hold a full planter.
Check the Water Gauge, Overflow Hole, and Material
A water gauge is a small float that pops up when the tank is full and drops when it’s empty. It saves you from guessing. Without one, you’ll lift the pot to judge the weight.
Look for an overflow hole near the top of the reservoir. It keeps water from rising into the soil if you pour too much.
Material changes how the pot behaves:
- Plastic is light, cheap, and holds moisture well.
- Glazed ceramic looks nice and stays put but adds weight.
- Unglazed clay breathes and dries faster, which suits plants that like a little less water.
- Opaque walls block light from the reservoir, which cuts down on algae.
A removable inner pot is worth paying for. It lets you check roots and clean the tank without unpotting the plant.
Match Indoor Containers to Your Space and Plant Collection
Think about where the pot will live. A fill tube in front is handy for high shelves or crowded corners. A slim pot fits a windowsill, while a wide floor planter suits a big fern.
If you have larger plant collections, group plants with similar thirst in matching pots so you can refill them on the same day.
Many outdoor plant pots with reservoirs have drain plugs for rain, so check the label if you want one indoors. For more styles, see my guide to pots for indoor plants.
How Do You Set Up a New Pot?
A good setup starts with a light potting mix and a few weeks of top-watering. Rushing straight to the reservoir is the most common reason a new pot fails.
Use a Potting Mix That Can Wick Water and Drain
Use a light indoor potting mix with peat or coco coir plus perlite. Avoid garden soil, which packs down and stops water from climbing.
For most tropicals, I’d mix about 3 parts potting mix with 1 part perlite. Add a handful of fine bark for peace lilies or pothos.
For African violets, use a violet mix with extra perlite. My guide to the best soil for indoor plants explains each ingredient.
Fill the wicking cup or wrap the wick with mix first. Press it gently so it touches the soil above, then plant without packing the soil down hard.
Top-Water First, Then Fill the Reservoir
Water from the top for the first 2 to 4 weeks. New roots haven’t grown down to the wet zone yet, so a plant can wilt above a full tank.
- Water slowly from the top until the whole root ball is evenly damp.
- Fill the reservoir only to the full mark or the overflow hole.
- Check the water level after a day or two. A small drop means wicking has started.
- Keep top-watering whenever the top inch feels dry.
- Switch to reservoir-only watering once the plant looks steady and the tank drains on its own.
Use room-temperature water. Cold water can shock tropical roots, especially in winter.
How Often Should You Refill the Reservoir?
Most indoor self-watering pots need a refill every 1 to 2 weeks, with small pots and herbs needing water every few days. The best schedule comes from watching your soil, plant, and room.
Check the Soil Before Following the Water Gauge
The gauge only tells you about the tank. It doesn’t tell you what the roots are feeling.
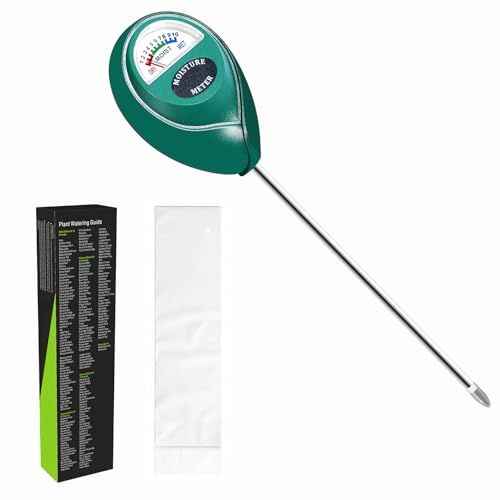
Before you refill, push your finger about 1 to 2 inches into the soil. If it’s still damp, wait.
If it’s dry and the gauge reads empty, it’s time. For larger pots, a wooden chopstick works well.
Pull it out and look for dark, damp soil stuck to it.
Adjust for Plant Size, Season, and Indoor Conditions
Expect big swings through the year:
- Spring and summer: Plants grow fast, and you may refill twice as often.
- Fall and winter: Growth slows. Stretch the time between refills.
- Bright light: Plants near a south or west window drink more.
- Low light: Plants near a north window or deep in a room use much less.
Region plays a part too. Dry winter heat in the Northeast and Midwest pulls water out of soil fast. Air-conditioned homes in the humid Southeast keep pots damp longer, and the dry Southwest empties tanks quickly all year.
Give the Reservoir and Soil Time to Dry When Needed
Don’t keep the tank full all the time. Roots need air as much as water.
My rhythm is to let the gauge read empty, wait one or two more days, then refill. That short dry spell pulls fresh air into the lower soil.
In winter, or for a plant that’s resting, wait longer or let the tank stay empty for a week.
How Do You Fertilize Without Salt Buildup?
Feed with weak liquid fertilizer and rinse the soil with plain water every few months. Salts from fertilizer and tap water can’t drain away in a closed reservoir, so they build up in the lower soil.
Dilute Liquid Fertilizer for Reservoir Feeding
If you add fertilizer to the reservoir, use it at a quarter strength. That’s weaker than the half strength I’d use for top-feeding, since the solution sits against the roots for days.
Feed only in spring and summer, about every 2 to 4 weeks. Give little or none from late fall to late winter. Fill the tank with plain water between feedings, and never fertilize every refill.
Nutrient-rich water also grows algae faster, so clean the tank more often if you feed through it. For product types, see my guide to liquid fertilizer for indoor plants, and for timing by plant, read how often to fertilize indoor plants.
Flush the Potting Mix with Plain Water
Every few months, flush the pot. Take it to a sink or tub and pour plain water through the top slowly, about twice the volume of the pot.
Let the water run out the overflow hole, then empty the reservoir completely and refill with fresh water. Signs you’re overdue include white crust on the soil or rim and brown, crispy leaf tips.
If your tap water is very hard, filtered water or rainwater cuts down on mineral crust.
Can You Make a DIY Wick Pot?
Yes, you can turn a regular nursery pot into a wick pot for a few dollars. You need a plastic nursery pot with drainage holes, a watertight outer container, a wick, and something to lift the inner pot.
Build a Simple Two-Container Setup
Use a synthetic wick such as nylon rope or a strip of acrylic yarn. Cotton rots over time in damp soil.
- Cut a wick about 8 to 12 inches long, depending on pot depth.
- Thread it through a drainage hole so 2 to 3 inches coil inside the bottom of the pot.
- Add potting mix and plant so the coiled wick sits under the roots.
- Set an upside-down saucer, a few clean stones, or a plastic riser in the outer container.
- Place the inner pot on top so it sits about 1 inch above where the water will be.
- Let the free end of the wick hang into the water. Add water until the wick tip is covered.
Keep the outer container opaque so light doesn’t reach the water.
Test the Wick Before Relying on the Reservoir
Water the soil from the top first so the wick is wet all the way through. A dry wick won’t start pulling.
Watch the water level for 2 or 3 days. If it drops and the soil stays lightly damp, the wick is working.
If the level doesn’t change, press the soil firmly around the wick or use a thicker one. Test it for at least a week before you leave the plant alone.
How Do You Keep the Reservoir and Wick Clean?
Rinse the reservoir every month or two and swap out the wick when it gets stiff or slimy. Standing water collects algae, minerals, and bits of soil over time.
Rinse Out Algae and Sediment
Green slime or a sour smell means it’s time to clean. Empty the tank and scrub it with a soft brush and warm water.
For stubborn algae, wipe it with a mix of 1 part white vinegar to 4 parts water. Rinse well before refilling. Keep the fill hole capped when you can, since light feeds algae.
During the growing season, a quick rinse every 4 to 8 weeks keeps buildup down. Do a deeper clean when you repot.
Replace a Clogged or Worn Wick
A healthy wick feels soft and slightly damp. A worn one feels stiff, crusty, or crumbles when you bend it.
If the tank stays full but the soil goes dry, the wick has likely clogged with minerals. Soak it in warm water and rinse it once.
If that doesn’t help, replace it with a new synthetic wick. I’d plan on a new wick about once a year, or sooner in hard-water areas.
What Should You Do If the Soil Stays Soggy?
Stop refilling and let the soil dry out as soon as you notice soggy soil. Constant wet soil is the main way self-watering pots go wrong, and the fix is usually quick if you catch it early.
Check for Overwatering and Root Rot
Overwatering signs include yellow lower leaves, wilting in wet soil, a musty smell, and soft stems at the soil line.
Slide the plant out and look at the roots. Healthy roots are firm and white or tan. Rotting roots are brown or black, mushy, and smell sour.
If you find rot, trim off the soft roots with clean scissors. Repot in fresh, dry mix and top-water lightly until the plant shows new growth. If the plant keeps declining, my guide on why your houseplant is dying covers other causes.
Let the Surface Dry to Discourage Fungus Gnats
Fungus gnat larvae live in the top 1 to 2 inches of damp soil. The reservoir keeps the lower soil wet, so you can let that top layer dry without harming the plant.
- Stop top-watering and let the surface dry.
- Hang yellow sticky traps to catch the adults.
- Add BTI (sold as mosquito bits) to the water you pour on the soil to kill the larvae.
For more help, see my guide to bugs in houseplant soil. White fuzz on top of damp soil is usually a harmless fungus from wet soil and poor airflow, and my post on white mold on indoor plants explains how to clear it.
Fix a Pot That Won’t Wick Water
Sometimes the tank stays full while the top dries out. Check these causes in order:
- Roots haven’t reached the water. Keep top-watering for a few more weeks.
- The wick lost contact. Press soil firmly around the wick or wicking cup.
- The mix is too dense or too chunky. Repot with a light mix of potting soil and perlite.
- The wick is clogged. Rinse or replace it.
Top-water once to wet everything again, then watch the level for a few days.
Frequently Asked Questions
Are self-watering pots good for all plants?
No, they suit plants that like evenly moist soil, such as peace lilies, ferns, African violets, pothos, and leafy herbs. Succulents, cacti, snake plants, ZZ plants, and orchids need to dry out and do better in regular pots.
How often do you fill a self-watering pot?
Most indoor pots need a refill every 1 to 2 weeks. Small pots, herbs, and plants in bright summer light may need water every few days, while large planters can last 2 to 4 weeks.
Can you overwater with a self-watering pot?
Yes, keeping the tank full at all times or overfilling past the overflow hole can keep the soil too wet. Let the reservoir run empty for a day or two before refilling so the roots get air.
Do self-watering pots cause root rot?
They can lead to root rot when used with drought-loving plants, dense soil, or a tank that never empties. With the right plant, a light mix, and short dry breaks, the roots stay healthy.
Can I put fertilizer in the reservoir?
Yes, but dilute liquid fertilizer to about a quarter strength and use it only every 2 to 4 weeks in spring and summer. Use plain water between feedings, and flush the soil every few months to clear salt buildup.

Hello there! I’m Elsa, and gardening is my passion. As an avid gardener, I created GardeningElsa.com to share my knowledge and experience with fellow enthusiasts. My website is a comprehensive resource for gardeners of all levels, offering expert advice on a wide range of topics, including plants, flowers, herbs, and vegetable gardening. Whether you’re a beginner looking to start your first garden or a seasoned pro seeking to expand your knowledge, GardeningElsa.com has something for everyone. Read more about me.