
A tidy garden is not just about looks. Good cleanup habits cut down on pests and disease, protect your soil, and give your plants a strong start each year.
These garden cleaning tips walk you through what to do in fall, what to save for spring, and how to keep things in shape all year.
I’ll be honest: cleanup is not about raking every leaf and cutting every stem to the ground. Some of the best work you can do is knowing what to leave alone. Let’s go season by season so you know exactly what to tackle and when.
Why Garden Cleanup Matters
Garden cleanup matters because it removes disease and weed seeds, protects your soil over winter, and keeps your tools and beds ready for the next season. Done the right way, it also supports birds and beneficial insects.
It Breaks the Cycle of Pests and Disease
Many plant diseases survive the winter on dead leaves, stems, and fruit. Blight on tomatoes and powdery mildew on squash are two classic examples. If that material stays in your beds, the problem can return next year.
Pests work the same way. Some insects lay eggs or overwinter in old plant debris. Clearing out infected or pest-heavy plants in fall is one of the simplest ways to get ahead of trouble.
If you’ve struggled with bugs this year, it helps to learn the most common vegetable garden pests so you know what to watch for while you clean.
It Protects Your Soil
Bare soil takes a beating in winter. Rain and wind wash away the top layer, and nutrients leach out. A good cleanup ends with covered beds, not empty ones.
Shredded leaves, compost, mulch, or a cover crop all keep soil in place. They also feed the soil life that makes your garden grow.
The Right Gear Makes It Easier
You don’t need a shed full of equipment for good cleanup. My advice is to start with two things that save the most time and effort.
- A pair of bypass pruners. These cut like scissors, so they make clean cuts on live stems and branches. Clean cuts heal faster and invite less disease.
- A leaf shredder or a mower with a bagger. Shredded leaves break down much faster than whole ones. They also won’t mat down into a soggy layer that smothers plants.
These are some of my favorite garden cleaning tips because they turn a pile of “waste” into free mulch and compost. That’s a core idea behind zero-waste gardening, and it saves you money too.
Fall Cleanup: What to Remove and What to Leave
In fall, remove spent annual vegetables, diseased plants, and weeds, but leave some perennial stems and seed heads standing for wildlife. The goal is a clean, covered garden, not a bare one.

What to Remove
Start with your vegetable beds. Once annual crops like tomatoes, peppers, beans, and squash are done, pull them out. Leaving them invites pests and disease to settle in for winter.
Here’s what should come out in fall:
- Spent annual vegetables. Pull them once they stop producing or after a hard frost.
- All diseased plant material. Blighted tomatoes, mildewed squash, and spotted leaves go in a bag or the trash.
- Weeds. Pull them before they set seed. One weed that goes to seed can mean many more next year.
- Rotting fruit. Fallen tomatoes, apples, and squash can harbor pests and disease.
- Tender bulbs and plants. Dig up dahlias, cannas, and gladiolus in cold climates and bring them indoors to store.
Healthy plant debris is a different story. Toss it in the compost pile, where it will break down into something useful.

What to Leave Standing
This is where many gardeners overdo it. You don’t need to cut every perennial to the ground in fall. In fact, I’d suggest you leave a good amount standing.
Hollow and pithy stems give native bees a place to shelter over winter. Seed heads from plants like coneflowers, black-eyed Susans, and ornamental grasses feed birds when food is scarce.
Standing stems also catch snow, which insulates plant crowns. And frankly, frosty seed heads look pretty in a winter garden.
Plan to cut these stems back to about 12 to 18 inches in spring. That leftover stubble keeps giving shelter to insects, and new growth quickly hides it.
Don’t Bag Your Leaves
Fallen leaves are one of the best free resources you’ll get all year. Please don’t send them to the curb in plastic bags.
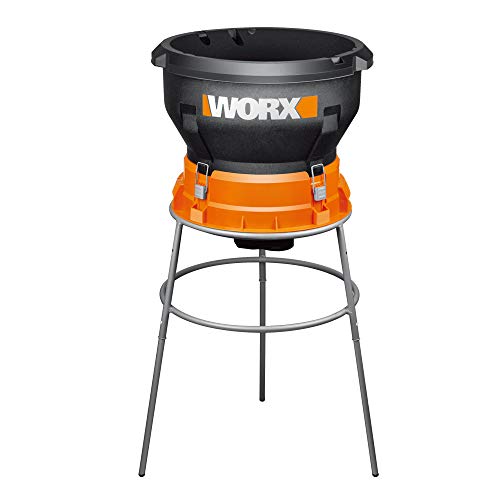
Shred them with a leaf shredder or by running a mower over them. Then use them as mulch on beds, or add them to your compost pile as a carbon-rich “brown” material.
Whole leaves can mat down and block air and water. Shredded leaves stay loose and break down faster, feeding your soil as they go.
Cover Bare Beds Before Winter
Once beds are cleared, don’t leave them bare. You have two good options: plant a cover crop or mulch the soil.

Cover crops like winter rye, crimson clover, or hairy vetch hold soil in place and add organic matter when you turn them under in spring. Mulching with shredded leaves or straw does a similar job with less planning.
Either way, you protect your soil and give it a head start. If you want to go further, my guide to improving garden soil covers more ways to build healthy beds over time.
Dealing With Diseased Plants and Weeds
Diseased plants should be bagged and thrown away, not composted, and weeds should be pulled before they go to seed. These two steps prevent a lot of problems next season.
Why Diseased Plants Stay Out of the Compost
Most home compost piles don’t get hot enough, long enough, to kill plant diseases reliably. If you compost blighted tomato vines, you may spread the disease right back into your beds with your finished compost.
So bag it up. Put diseased leaves, stems, and fruit in a trash bag and send it out with your household garbage. Some areas also allow it in municipal yard waste programs, so check your local rules.
Watch for these signs of disease as you clean:
- Brown or black spots on leaves
- White or gray powdery coating
- Yellowing leaves with dark patches
- Wilting plants with healthy-looking soil moisture
- Mushy, rotting stems near the base
When in doubt, throw it out. It’s not worth the risk.
Keep Your Hands and Tools Clean
Disease can travel on your tools and gloves. After cutting diseased plants, wipe your pruners with 70% rubbing alcohol before moving to healthy plants.
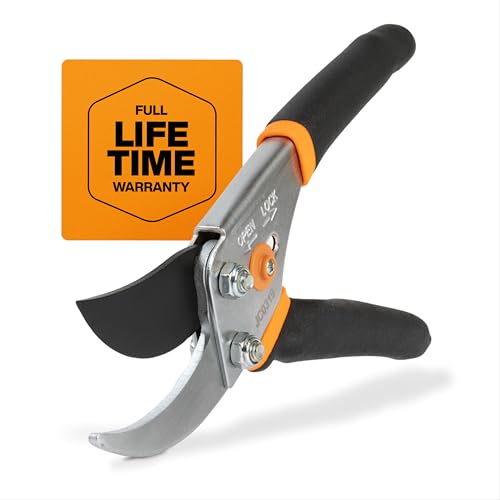
It’s a small step, but it stops you from carrying problems from one bed to the next. I keep a spray bottle of rubbing alcohol in my tool bucket for this reason.
Pull Weeds Before They Set Seed
Weeds are easiest to handle when they’re small. Once they flower and drop seed, you’re dealing with them for years.
In fall, focus on pulling any weeds that are flowering or forming seed heads. Get as much of the root as you can, especially with perennial weeds like dandelions and bindweed.
Weeds that haven’t set seed can go in the compost. Weeds that have gone to seed, or that spread by roots and runners, should go in the trash.
Caring for Tools, Hoses and Pots
Before winter, clean, sharpen, oil, and dry your tools, drain and store your hoses, and empty and scrub your pots. Good care now means your gear lasts for years.

Cleaning and Storing Hand Tools
Dirty, wet tools rust and dull quickly. A few minutes of care in fall saves you from replacing them every spring.
Follow these steps:
- Scrub off soil. Use a stiff brush and water to remove dirt and sap. A putty knife helps with caked-on mud.
- Disinfect pruners. Wipe the blades with 70% rubbing alcohol to kill disease organisms.
- Sharpen blades. Use a file or sharpening stone on pruners, shovels, and hoes. Sharp tools cut cleanly and take less effort.
- Oil metal parts. A light coat of oil keeps rust away. Work a drop into the pivot of your pruners too.
- Store dry. Hang tools in a dry shed or garage, off the ground.
Wooden handles appreciate a little care too. Sand rough spots and rub in some linseed oil to keep them from cracking. If you’re thinking about upgrading your kit, here’s my roundup of gardening tools and equipment worth owning.
Draining and Storing Hoses
Water left in a hose can freeze, expand, and split it. The same goes for outdoor faucets and the fittings attached to them.
Disconnect hoses from the spigot before your first hard freeze. Stretch them out on a slight slope to drain, then coil them loosely.
Store them in a garage, shed, or basement where they’re out of the sun and cold. If you have frost-free spigots, make sure the hose is off, or the protection won’t work.
Emptying and Cleaning Pots
Terra cotta and ceramic pots can crack if wet soil freezes inside them. Plastic pots handle cold better but still benefit from cleaning.
Empty spent potting mix into a compost pile or onto garden beds, unless the plants in it were diseased. Then scrub pots with warm, soapy water and a brush to remove salt buildup and soil.
For pots that held sick plants, follow up with a soak in a diluted bleach solution, about one part bleach to nine parts water. Rinse well and let them dry before stacking.
Store clean pots upside down or under cover. Bring tender potted plants indoors before frost.
Spring Cleanup: Waking the Garden Up
Spring cleanup means cutting back old stems once it’s warm enough, pruning dead wood, dividing crowded perennials, and preparing beds for the new season. Patience is the key, since starting too early can harm beneficial insects.