
A leggy dieffenbachia is a fixable problem, and you don’t need to replace the plant.
To make dieffenbachia bushy, move it into bright, indirect light, then cut the bare cane back to about 6 inches above the soil, just above a node, in spring or summer so new shoots sprout below the cut.
Then root the leafy top you removed and plant it back in the same pot, or plant several rooted stems together. Light fixes the cause, pruning resets the shape, and extra stems fill the pot faster than one cane ever will.
Why Does Dieffenbachia Get Leggy?
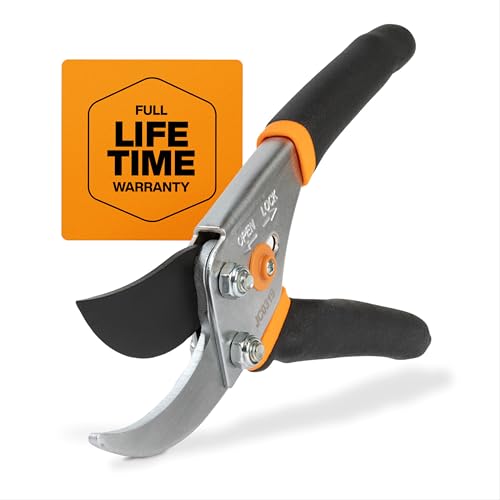
Dieffenbachia gets leggy for two main reasons: it stretches when light is too weak, and its older canes shed lower leaves as they age. If you are stocking up, a pair of bypass pruners is the first thing I would pick up.
Most leggy plants have both problems at once, which is why a tall stem with a small tuft of leaves on top is such a common sight.
How Low Light Stretches the Stems
Dieffenbachia (dumb cane) is an aroid from the shady forests of tropical Central and South America and the Caribbean. It tolerates medium light, but in a dim corner it grows toward the nearest window.
That stretching makes the spaces between leaves, called internodes, longer. You’ll also see smaller new leaves and faded variegation, so a ‘Camille’ or ‘Tropic Snow’ starts looking plainer green.
The plant leans because the light comes from one side. Over months, it ends up as a thin, tilted stem with a few leaves at the top.
Why Older Canes Lose Their Lower Leaves
Every dieffenbachia drops its oldest bottom leaves over time. That’s normal aging, and it slowly turns a full plant into a bare cane with a crown of leaves, a bit like a small palm tree.
Indoors, these plants reach 3 to 6 feet tall, so the bare section can get long. Low light, cold drafts, and soggy soil speed up that lower leaf drop.
If yellowing spreads past the bottom one or two leaves, check my guide to dieffenbachia leaves turning yellow before you prune.
Give Your Plant More Light Before You Prune
Fix the light first, because a pruned plant left in a dim spot will grow back just as stretched. Bright, indirect light keeps new shoots short and leafy.
Where to Find Bright, Indirect Light
In most US homes, these spots work well:
- East-facing window: gentle morning sun, about right for dieffenbachia.
- North-facing window: steady but weaker light; place the plant right at the glass.
- South or west window: set the plant 3 to 5 feet back, or behind a sheer curtain.
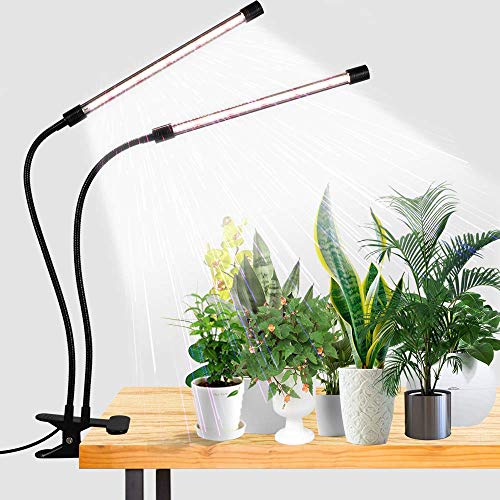
- Grow light: an LED fixture 12 to 18 inches above the leaves for 12 to 14 hours a day.
In the Northeast, Midwest, and Pacific Northwest, winter days are short and gray. I’d add a grow light from November to March in those regions. In the Southwest and Southeast, the bigger risk is harsh afternoon sun through west windows.
You can find more on placement, humidity, and temperature in my full guide to dieffenbachia care.
How to Spot Too Much or Too Little Sun
Your plant shows you which way to adjust. Use this quick check:
| Sign | Likely cause | Fix |
|---|---|---|
| Long gaps between leaves, small leaves | Too little light | Move closer to a window or add a grow light |
| Faded variegation, leaning stem | Too little light | Brighter spot, turn the pot more often |
| Bleached or crispy brown patches | Direct afternoon sun | Pull back from the glass or add a sheer curtain |
| Pale yellow tint across sunny side | Too much sun | Filter the light |
Give the plant two to four weeks in its new spot before you cut. That lets it adjust and gives you time to see whether the new light suits it.
Where and When Should You Cut Back a Leggy Cane?
Cut just above a healthy node, about 6 inches above the soil, during spring or summer. New shoots only come from nodes, so the cut placement decides where your plant branches.
Choose a Healthy Node and Set the Cutting Height
A node is the slightly raised ring on the cane where a leaf once grew. Dormant buds sit at those rings, and they wake up once the top of the stem is gone.
Here’s how I’d pick the spot:
- Look along the lower cane for two or three plump, firm rings.
- Pick the highest healthy one about 6 inches above the soil.
- Plan your cut about ¼ inch above that node.
If the cane is soft, mushy, or dark at the base, that’s stem rot. Don’t top a rotting cane; deal with the rot first. If you’re torn between two nodes, choose the lower one, since you can always trim more later.
A moderately leggy plant that still has some lower leaves may only need the top 12 to 24 inches removed. Leave those lower leaves on to feed the plant while it regrows.
Make a Clean Cut During Active Growth
Late spring through early summer is the best window. Longer days and warm rooms help the cut seal and the buds break faster.
Use sharp, clean pruners or a knife, and make one firm cut at a slight angle so water doesn’t sit on top. Several small cuts leave more wounds and more sap. Skip wound sealant; the cut heals best open to the air.

If your plant is badly leggy in fall, I’d wait until spring. Cuts made in winter can sit for two months with little to show. A cane that’s snapping or rotting is the exception, so remove it right away.
What Grows Back After You Cut the Cane?
New shoots grow from the dormant buds at the nodes just below your cut, and sometimes one node sends out two or three. That’s how a single bare stem turns into a multi-stem plant.
Where New Shoots Appear
Watch the top one or two nodes on the stump first. You’ll see a small bump swell, then a pale green point push out from the side of the cane.
Some plants also send up new shoots from the soil line, called basal offsets. Keep them; they add fullness right where a leggy plant looks thinnest.
The stump looks bare for a while, and that’s normal. Keep the plant in bright, indirect light and water lightly, since a plant with few leaves uses much less water.
How Long Regrowth Can Take
In warm rooms around 70 to 80°F with good light, new buds show up in about two to four weeks. In a cooler house or in winter, it can take six to eight weeks or more.
Expect the first new leaves to be small. It takes a few months of growth before the shoots fill in, and a full, rounded look takes most of a growing season.
If nothing happens after eight weeks in summer, scratch the cane lightly with your fingernail. Green tissue means it’s alive and waiting; brown and soft means the stump has rotted.
How to Root the Cut Top
The leafy top you cut off roots easily, so treat it as a second plant. Dieffenbachia roots in about 3 to 6 weeks in water or moist potting mix at 70 to 80°F.

Root a Stem Tip in Water or Potting Mix
Start by trimming the cutting so it has at least one node below the leaves and 4 to 6 inches of stem. Pull off the lowest leaf or two so nothing rots below the waterline or soil.
In water: Set the cutting in a clear jar with the bottom node under water and the leaves above it. Change the water every few days and keep the jar in bright, indirect light, out of direct sun.
In potting mix: Push the stem into damp, well-draining mix with perlite so the node is buried. Keep it evenly moist and warm; a loose plastic bag over the pot holds in humidity.
Rooting hormone is optional. The bare cane below the cut top can also become new plants: slice it into 2- to 3-inch pieces with a node each and lay them sideways on moist mix.
A single leaf without a piece of stem won’t work, which I explain in my post on whether you can propagate dieffenbachia from a leaf.
Move a Rooted Cutting Into Soil
Pot up water-rooted cuttings once roots reach 2 to 3 inches long. Cuttings can survive in a jar for a long time, and you can grow dieffenbachia in water, but they grow stronger in soil.
Use a pot with drainage holes and a peat- or coir-based mix with perlite. Keep the soil a little more moist than usual for the first two weeks while the water roots adjust, then go back to normal watering.
Plant Several Stems Together for a Fuller Pot
The fastest way to get a bushy dieffenbachia is to grow three to five stems in one pot. A single cane, even after pruning, takes a long time to look full on its own.
Combine Rooted Cuttings Without Crowding the Roots
Once your cuttings have roots, plant them back around the original stump or together in a new pot. Space them 2 to 3 inches apart in a circle so each has room.
For three to four stems, an 8- to 10-inch pot works well. Mix in some shorter cuttings with taller ones so leaves fill both the top and the middle of the plant.
Avoid jumping to a pot that’s much larger than the root mass. Extra soil stays wet too long and invites rot.
Keep Basal Offsets or Divide an Overcrowded Plant
Mature dieffenbachias often send up offsets from the base. Leave them in place to thicken the pot, or move them around to fill gaps.
If a pot gets packed with stems and roots circling the bottom, dividing it gives you two fuller plants. Do this in spring, tease the root ball apart so each section has roots and stems, and repot into fresh mix.
My step-by-step guide shows how to split a dieffenbachia cleanly.
Rotate and Feed for Even Growth
Turning the pot and feeding lightly keep new shoots growing evenly. Both are small habits that stop the plant from going lopsided again.
Turn the Pot for Balanced Light
Give the pot a quarter turn every week or two. That way each side faces the window in turn, and the stems grow straight up.
A plant that’s never turn