
You can grow podocarpus from cuttings by taking 4- to 6-inch semi-hardwood stem tips in summer or early fall, dipping the cut ends in rooting hormone, and keeping them in a moist, airy mix under high humidity until roots form. Plan on a slow wait.
Most cuttings need about 2 to 4 months to root, and some take longer.
That patience pays off. Podocarpus macrophyllus (yew pine, Buddhist pine, or Japanese yew) is an evergreen conifer from southern Japan and China.
A rooted cutting grows into an exact copy of the shrub you cut it from, so one good hedge plant can give you a whole row of matching plants for the cost of some potting mix.
When Is the Best Time to Take Podocarpus Cuttings?
The best time to propagate podocarpus is summer through early fall, once the spring flush of new growth has firmed up. Warm-region gardeners have a long window for this, while gardeners in cooler zones need to plan around frost and indoor heat.
Why Summer to Early Fall Works Well
Podocarpus puts out soft new shoots in spring. By midsummer, those shoots have started turning woody at the base but still bend at the tip, which is the stage that roots best.
Summer cuttings also get warm days to kick-start root growth. Fall cuttings root more slowly, but they lose less water through their needles in cooler air. I’d aim for July through September in most of the country.
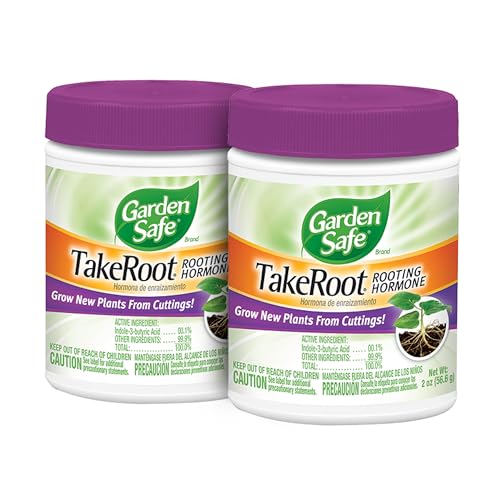
Before you start, pick up a rooting hormone powder or gel. If your cuttings will sit indoors as the weather cools, a seedling heat mat is worth adding, since it keeps the mix warm from below.
How Timing Changes in Cooler US Regions
Podocarpus grows outdoors in USDA zones 8 to 11, with 7b as a borderline spot. In the Southeast, Gulf Coast, Southern California and the Southwest, you can take cuttings from June into October.
North of zone 8, most people grow podocarpus as a potted plant that comes inside for winter. Take cuttings while the pot is still outside in summer, so the stems come from a plant in active growth.
If you’re wondering how your parent plant will handle the season, my guide to podocarpus in cold weather covers the temperature limits.
In the Northeast, Midwest and Pacific Northwest, cuttings taken in late summer will spend most of their rooting time indoors. Give them steady warmth through fall and winter.
Which Stems Should You Cut?
Cut semi-hardwood stems from healthy, vigorous growth on the outer parts of the plant. Stem cuttings at this stage root far more reliably than old, woody wood.
How to Recognize Healthy Semi-Hardwood Growth
Semi-hardwood cuttings come from this year’s growth after it has matured a bit. Here’s what to look for:
- Firm lower stem: The base feels woody and holds its shape.
- Flexible tip: The top few inches still bend without snapping.
- Deep green needles: Leaves look full and glossy, with no yellowing or spots.
- No pests: Check the undersides for scale, mealybugs or sticky honeydew.
- No seeds or cones: Stems carrying them put energy into reproduction first.
Choose a parent plant that’s big enough to spare a few stems. Shearing a hedge in early summer leaves plenty of new growth to cut later, and taking tips is a lot like the light pruning I recommend to make podocarpus grow thicker.
Why Older Hardwood Stems Are Less Reliable
Hardwood cuttings come from older, brown, fully hardened branches. Those stems have fewer active cells near the cut, so they root slowly or not at all.
Older wood also sits in the mix for months without roots, and that long wait gives rot more chances to set in. If your plant only has old wood, prune it in spring and wait for new shoots to firm up by summer.
What Tools and Rooting Mix Do You Need?
You need sharp, clean pruning shears, small pots with drainage holes, rooting hormone and a well-draining potting mix that stays lightly moist. Cleanliness and good drainage do most of the work in preventing failure.
Clean Cutting Tools and Small Pots
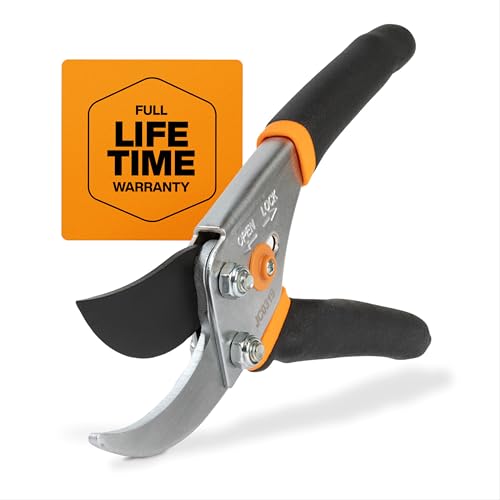
Use bypass pruning shears or a sharp knife. Dull blades crush the stem, and crushed tissue rots easily.
Wipe the blades with rubbing alcohol before you start and between plants. A mix of 1 part bleach to 9 parts water works too.

For containers, I like 3- to 4-inch pots or a nursery tray about 4 to 6 inches deep. Small pots dry out at a sensible pace, while big pots hold extra wet mix around a cutting that has no roots to use it.
Your full kit:
- Pruning shears or a sharp knife
- Rubbing alcohol for cleaning tools
- Rooting hormone (powder or gel)
- Small pots or a tray with drainage holes
- Rooting mix
- A pencil or chopstick for making holes
- A clear plastic bag or humidity dome
- A spray bottle
An Airy Mix That Holds Moisture Without Staying Soggy
Regular garden soil is too heavy for rooting. Use a light, sterile blend instead.
I’d mix one of these:
| Mix | Ratio | Why It Works |
|---|---|---|
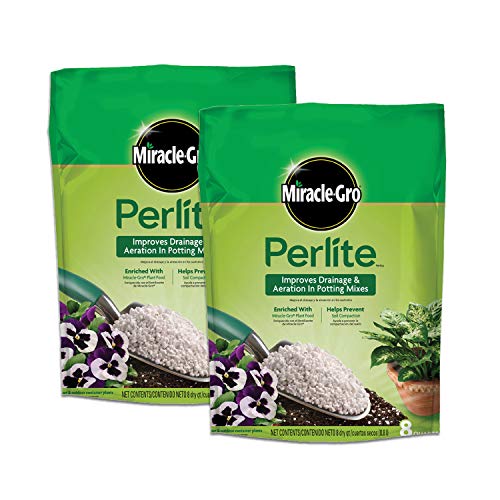
| Peat or coir + perlite | 1:1 | Holds moisture with plenty of air |
| Peat or coir + coarse sand | 1:1 | Heavier, steadies tall cuttings |
| Seed-starting mix + perlite | 2:1 | Fine texture, easy to find |
Squeeze a handful after wetting it. It should feel like a wrung-out sponge and crumble apart. If water drips out, add more perlite.
How to Prepare and Plant the Cuttings
Preparing podocarpus cuttings takes about a minute each once your tools and mix are ready. Each step below protects the stem from drying out or rotting before it can root.
Cut Below a Node and Remove Lower Leaves
Snip a 4- to 6-inch piece from the tip of a healthy branch. Make your cut just below a node, the spot where a leaf joins the stem, because new roots form there.
Strip the needles from the bottom half of the cutting. Leave the top cluster of leaves in place so the cutting can keep making food.
If the remaining leaves are long, you can trim them by about half to cut down on water loss. Keep your cuttings in a damp paper towel or a plastic bag in the shade until you plant them, so they stay crisp.
Apply Rooting Hormone and Insert Each Cutting
Pour a little rooting hormone into a separate dish. Dipping straight into the jar can spread disease to the rest of the product.
Dip the bottom inch of each stem, then tap off the extra powder. Too much hormone can damage the stem.
Use a pencil to poke a hole in the pre-moistened mix that’s wider than the stem. Slide the cutting in about 1.5 to 2 inches deep so the hormone stays on, then press the mix lightly around it.
You can place several cuttings in one pot. Space them so their leaves don’t touch, which helps air move between them.
Water Gently Without Packing Down the Mix
Water slowly with a spray bottle or a small watering can on a gentle setting. The goal is to settle the mix around each stem.
Let the pot drain completely. Don’t press the mix down hard with your fingers, because packed mix squeezes out the air the new roots need.
How to Keep Cuttings Humid Without Causing Rot
A clear cover that traps humidity, opened briefly each day for fresh air, keeps cuttings from drying out while they have no roots. Watch the moisture on the inside of the cover and the smell of the mix to know when to vent.
Using a Clear Bag or Humidity Dome
A cutting has no roots to replace the water its needles lose. High humidity slows that loss down.
The easiest setup is a clear plastic bag over the pot. Push two or three chopsticks into the mix to hold the bag above the leaves, then tuck the bag under the pot.
A humidity dome over a nursery tray works the same way and is easier for a large batch. Domes with adjustable vents let you control airflow without lifting the lid.
When to Vent, Mist, and Remove the Cover
Open the bag or dome for about 10 to 15 minutes once a day. This lets out stale air and lowers the risk of mold.
Use these signs to adjust:
- Heavy drops running down the cover: Vent longer or crack it open overnight.
- Dry-looking cover and dull needles: Mist the leaves and keep the cover closed more.
- Musty smell or fuzzy white growth: Vent for a full day and let the surface dry slightly.
Once you see new growth or feel roots, start opening the cover a bit more each day. Over one to two weeks, remove it completely.
What Light and Warmth Help Roots Form?
Bright, indirect light and a steady 70 to 75°F give podocarpus cuttings the best conditions for root development. Both direct sun and cold rooms slow rooting down.
Bright Indirect Light Instead of Hot Direct Sun
Cuttings need light to make food, but direct sun under a plastic cover turns the bag into an oven. It can scorch the needles within an afternoon.
Indoors, an east-facing window or a spot a few feet back from a south or west window works well. A simple LED grow light set 12 to 18 inches above the tray for 12 to 14 hours a day is a good choice in winter.
Outdoors, place cuttings under a tree or on a covered porch with bright shade all day.
Steady Warmth and Even Moisture
Roots form fastest when the mix stays around 70 to 75°F. Below about 65°F, rooting slows and cuttings sit wet longer.
A heat mat under the tray keeps the root zone warm in a cool basement or a winter windowsill. Keep cuttings away from heat vents, drafty doors and cold glass.
Check the mix every few days by touching the surface. Water when the top half inch feels barely damp, and stop before the mix turns soggy.