
If your holiday cactus just finished blooming, you’re holding one of the easiest plants to multiply. You can propagate Christmas cactus from a few twisted-off stem pieces, and with a little patience, those pieces turn into full, flowering plants you can keep or share.
The method is simple. Snap off a stem with 2 to 5 segments, let it dry for a day or two, and set it in moist, fast-draining mix in bright, indirect light.
Roots usually show up in 2 to 4 weeks, and new growth follows soon after.
Choosing the Best Time and Healthy Stems for Cuttings
The best time is late spring to early summer, about April to June, right after flowering ends. Pick firm, plump stems from a healthy plant, and you’ve already done half the work.
Why Late Spring Works Best
After blooming, a Christmas cactus (Schlumbergera) takes a short rest and then pushes out fresh growth. That growth spurt is your signal. Cuttings taken now root faster and have the whole summer to grow before fall.
Warm rooms and longer days help too. Roots form best between 65°F and 75°F, which most homes hit naturally from April through June.
You can take cuttings in summer as well. Just keep them out of hot afternoon sun, since an unrooted stem has no way to replace lost water.
When to Avoid Taking Cuttings
Skip cuttings in fall, when your plant is setting buds. The plant is putting its energy into flowers, and cutting it then can cost you blooms. It also leaves cuttings rooting in cool, dim conditions.
Winter cuttings can work indoors, but they root slowly. Below 60°F, rooting may stall for weeks, so I’d wait for spring if you can.
How to Spot a Healthy Stem
Look for stems that feel firm and look deep green. Each flat segment should be plump, not wrinkled, limp, or reddish from stress.
Avoid any stem with soft spots, mushy joints, or signs of pests. A cutting is only as healthy as the plant it came from.
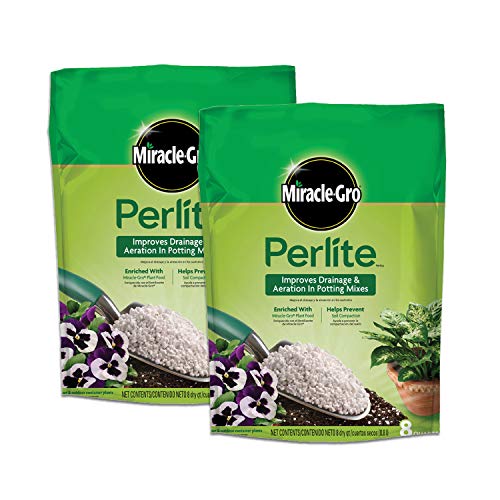
Before you start, gather a bag of potting mix and some perlite. Those two products make a light, fast-draining rooting mix, and you’ll want them ready once your cuttings have callused.
Supplies You Need to Propagate Christmas Cactus
You need very little to propagate Christmas cactus: a healthy plant, clean hands or pruners, small pots, and a fast-draining mix. A clear bag and a glass jar are nice extras.
Basic Tools and Containers
Here’s my short list:
- Clean, sharp pruners or scissors (optional, since twisting works well)
- 70% rubbing alcohol to wipe blades
- A 4-inch pot with drainage holes
- A paper towel or plate for drying cuttings
- A clear plastic bag for extra humidity
- A small glass or jar if you want to try water rooting
A 4-inch pot holds 3 to 5 cuttings nicely. Drainage holes aren’t optional. Standing water is the fastest way to lose a cutting.
The Right Rooting Mix
Christmas cactus is a forest cactus, not a desert one. In the wild, it grows on trees, so its roots like air and quick drainage but also some moisture.
I recommend regular potting mix blended with perlite, roughly two parts mix to one part perlite. The perlite opens up air pockets and keeps the mix from staying soggy.

My guide to the best soil for indoor plants explains more about why drainage matters so much.
Pure cactus mix works in a pinch, though it can dry out faster than this plant likes. Heavy garden soil is a hard no.
Optional Extras
Rooting hormone isn’t necessary. Christmas cactus roots readily on its own, especially in spring.
A spray bottle can help you dampen the mix gently without flooding it. A small saucer under the pot keeps your windowsill dry, as long as you empty it after watering.

| Supply | Needed? | Why It Helps |
|---|---|---|
| Potting mix + perlite | Yes | Light, fast-draining rooting medium |
| 4-inch pot with drainage | Yes | Holds 3 to 5 cuttings, drains excess water |
| Rubbing alcohol | If cutting | Keeps tools clean |
| Clear plastic bag | Optional | Raises humidity |
| Glass jar | Optional | For water rooting |
| Rooting hormone | No | Not needed for this plant |
How to Take Christmas Cactus Cuttings
Twist or cut off a stem piece with 2 to 5 connected segments, breaking cleanly at a joint. That’s all a cutting needs to grow into a new plant.
Twisting vs. Cutting
Christmas cactus stems are made of flat, linked segments. Each joint is a natural break point.
To twist, hold the stem just below the joint you want and gently rotate the piece above it until it pops free. It usually separates cleanly with almost no damage.
If you’d rather cut, wipe your pruners with rubbing alcohol first. Then snip right at the joint, not through the middle of a segment.

How Many Segments to Take
My advice is to aim for 2 to 5 segments per cutting. Three is a nice middle ground.
A single segment can root, but it has less stored energy and grows slowly. Very long cuttings can get top-heavy and tip over in the pot.
Taking Cuttings Without Hurting the Parent Plant
Take cuttings from different spots around the plant, not all from one side. That keeps the parent balanced and full.
Cutting back stem tips actually helps the mother plant. It encourages branching at the joints you leave behind, which means more stems and more flowers next season.
Don’t remove more than about a third of the plant at once. A light trim is plenty for a pot full of cuttings.
Letting Cuttings Callus Before Planting
Let your cuttings sit in a dry, shaded spot for 1 to 3 days until the cut end seals over. This callus step is the simplest way to prevent rot.
Why Callusing Matters
A fresh break is an open wound. If it goes straight into moist mix, water and fungus can move right into the tissue.
Once the end dries and forms a thin, firm skin, it’s much better protected. Roots will grow out from that sealed base.
Where to Dry Your Cuttings
Lay the cuttings on a paper towel or plate. Put them somewhere warm and airy, out of direct sun.
A kitchen counter or a shelf a few feet from a window works well. Keep them away from heater vents, which can dry them out too fast.
How to Tell When They’re Ready
A callused end looks dry and slightly lighter in color, with no wet shine. It should feel firm when you touch it gently.
In most homes, one or two days is enough. In humid summers, give it the full three. If you’re unsure, an extra day won’t hurt.
Rooting Christmas Cactus Cuttings in Soil
Insert the callused bottom segment about 1 inch deep into moist, fast-draining mix and keep it upright. Soil rooting is the most reliable method and avoids a tricky transplant later.
How Deep to Plant
Bury roughly a quarter of the cutting’s length. For most cuttings, that’s about 1 inch, or the bottom segment.
Push the cutting in upright, with the segments pointing up the way they grew. Firm the mix lightly around the base so it stands on its own.
Don’t bury it too deep. Extra segments underground just sit in moisture and can rot.
Planting Several Cuttings for a Fuller Pot
I like to place 3 to 5 cuttings in one 4-inch pot. Space them evenly around the pot, about an inch from the edge.
This gives you a bushier plant from day one. A single cutting grows into a nice plant too, but it takes longer to look full.
Prepping the Mix
Moisten your potting mix and perlite blend before planting. It should feel like a wrung-out sponge, damp but never dripping.
Fill the pot, tap it gently to settle the mix, and make a small hole with a pencil for each cutting. That keeps the callused end from scraping as it goes in.
This process is a lot like how you’d propagate jade plant cuttings, with one big difference. Jade wants bone-dry mix at first, while Christmas cactus prefers light, steady moisture.
Rooting Christmas Cactus Cuttings in Water
Yes, Christmas cactus roots in water. Set the callused end so only the bottom segment touches water, change the water every few days, and pot up once roots are 1 to 2 inches long.
Setting Up a Water Cutting
Use a small, narrow glass or jar. Narrow openings help hold the cutting upright.
Add just enough water to cover the bottom segment. Keep the rest of the cutting dry, since segments sitting underwater can turn mushy.
Place the jar in bright, indirect light. Clear glass lets you watch roots form, which is half the fun.
Keeping Water Fresh
Change the water every few days. Fresh water carries more oxygen and keeps bacteria from building up.
If the water turns cloudy or smells off, swap it right away. Rinse the jar too.
Check the base of the cutting each time. If it looks dark or soft, trim back to firm tissue, let it callus again, and start over.
Moving Water Roots to Soil
Pot up once roots reach 1 to 2 inches long. Waiting much longer lets roots grow too used to water, and they adjust more slowly.
Plant into moist potting mix with perlite, burying the roots and base about 1 inch deep. Keep the mix lightly moist for the first couple of weeks while the roots adapt.
A little drooping right after the move is normal. If you’ve rooted other plants this way, the p