
Hydroponic root rot is one of the most common problems indoor growers face, and it can wipe out a healthy crop in days. The good news is that it follows a predictable pattern, and most cases trace back to a few fixable causes.
In this guide, I’ll walk you through how to spot it early, what triggers it, how to treat it and how to keep it from returning. My advice is simple: catch it fast, clean everything and fix the conditions that let it start.
What Hydroponic Root Rot Looks Like
Hydroponic root rot shows up as brown, slimy, bad-smelling roots, usually paired with wilting leaves even though the plant sits in water. Healthy roots are white or cream and firm, so the contrast is easy to see once you know what to look for.
Signs in the Roots
Pull a plant up and look closely at the root mass. Healthy roots look bright, clean and a little fuzzy at the tips.
Rotting roots look very different. Watch for these signs:
- Brown or tan color instead of white or cream
- A slimy, mushy feel when you pinch them
- Outer root tissue that slides off and leaves a thin stringy core
- A sour, swampy or rotten smell
- Brown film or slime clinging to the net pot or reservoir walls
Don’t confuse stained roots with rotting ones. Some nutrients or coco coir can tint roots tan, but stained roots stay firm and smell clean.
Signs Above the Waterline
The leaves often tell you something is wrong before you check the roots. Damaged roots can’t move water and nutrients well, so the plant starts to struggle.
Common symptoms include:
- Wilting during the day, even with plenty of solution
- Yellowing leaves, often starting with older growth
- Slow or stalled growth
- Leaf edges that brown or curl
- Plants that look worse in the warmest part of the day
These signs can overlap with nutrient or pH problems. That’s why checking the roots directly is the fastest way to confirm what you’re dealing with.
Tools That Help You Spot It Early
Two inexpensive tools make a big difference. An aquarium thermometer lets you track reservoir temperature, which is one of the biggest root rot triggers.
An air pump with an air stone keeps oxygen in the solution and gives you a quick visual check. If the bubbles stop, you know your roots are losing oxygen.

| Feature | Healthy Roots | Rotting Roots |
|---|---|---|
| Color | White or cream | Brown or tan |
| Texture | Firm | Slimy, mushy |
| Smell | Clean or earthy | Sour, rotten |
| Plant response | Steady growth | Wilting, yellowing |
What Causes Root Rot in Hydroponics
Root rot in hydroponics is usually caused by water mold or other pathogens, most often Pythium, that take hold when roots are stressed. Warm water, low oxygen, light leaks and dirty equipment create the conditions those pathogens love.
The Role of Pythium and Other Pathogens
Pythium is a water mold that thrives in wet, warm, poorly oxygenated conditions. It attacks root tissue and spreads quickly through shared solution.
In a recirculating system, one infected plant can affect every plant connected to the same reservoir. That’s what makes root rot in hydroponics so fast compared to soil.
Other fungi and bacteria can join in once roots start breaking down. Dead root tissue feeds even more microbes, which pulls oxygen out of the water and makes things worse.
Stress Opens the Door
Healthy roots resist infection much better than stressed ones. Pathogens often move in after something has already weakened the plant.
Common stressors include:
- Water that runs too warm
- A failed air pump or clogged air stone
- pH drifting outside the 5.5 to 6.5 range for most crops
- Nutrient solution mixed too strong for the crop
- Physical damage from rough handling during transplanting
Keep your EC in range for what you grow. Leafy greens like roughly 0.8 to 1.6 mS/cm, while tomatoes and peppers prefer roughly 2.0 to 3.5.
Which Systems Are Most at Risk
Any system can develop root rot, but some are more vulnerable. Deep water culture (DWC) keeps roots submerged, so it depends completely on aeration and cool water.
Kratky is passive with no pump. As the solution drops, it leaves an air gap that roots use for oxygen. Problems start when growers keep refilling it to the top and drown that air gap.
NFT runs a thin film of solution through channels, and ebb and flow floods and drains a tray. Both give roots more air, but clogged channels, pump failures or standing water can still cause trouble.
| System | Main Root Rot Risk |
|---|---|
| Deep water culture | Warm water, failed aeration |
| Kratky | Overfilling, no air gap |
| NFT | Clogs, pooling, pump failure |
| Ebb and flow | Poor drainage, standing water |
| Wick and countertop | Stagnant solution, warm rooms |
If you’re new to these setups, my guide on how to start hydroponic gardening explains each system type in more detail.
Warm Water and Low Oxygen
Warm water and low oxygen are the top two causes of root rot, and they’re closely linked. Above about 75°F, water holds less dissolved oxygen, and Pythium risk climbs fast.
Why Temperature Matters So Much
Water temperature between 65 and 72°F is ideal for most hydroponic crops. In that range, roots stay active and the water holds plenty of oxygen.

Once the reservoir creeps past 75°F, two things happen at once. Oxygen drops, and pathogens grow faster. Roots also use more oxygen in warm water, so they run short quickly.
Summer heat, warm grow rooms and lights placed too close to the reservoir can all push temperatures up. Small reservoirs warm up faster than large ones, too.
How to Keep Water Cool
Check your reservoir temperature daily, especially in summer. A thermometer that stays in the water makes this easy.
Here are practical ways to cool things down:
- Move the reservoir off warm floors or away from heat sources
- Keep lights and ballasts away from the solution
- Use a larger reservoir, since more water changes temperature slowly
- Wrap or shade the reservoir with reflective material
- Swap in frozen water bottles during heat waves, sealed so they don’t dilute the solution
- Run the system in a cooler room, such as a basement
For serious heat problems, some growers use a water chiller. It’s an added cost, but it can save a DWC setup in a hot climate.
Keeping Oxygen Levels Up
Roots need oxygen to stay healthy. In DWC, an air pump pushes air through an air stone to keep the solution moving and oxygenated.
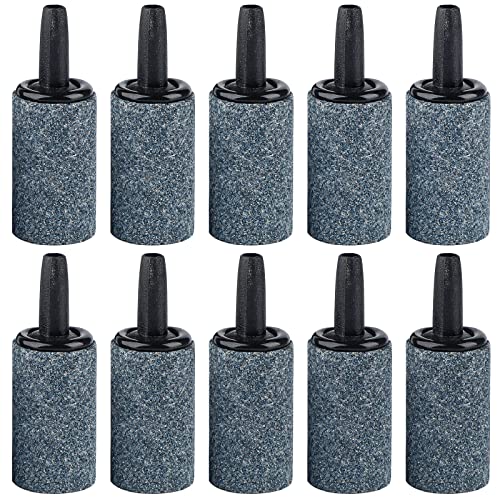
Pick a pump sized for your reservoir and check that bubbles cover a good part of the surface. Clean or replace air stones when they clog, since mineral buildup reduces airflow.
Plug pumps and lights into GFCI outlets and use drip loops on cords. Water and electricity are close together in these systems, so this is a simple safety step.
Remember that a pump or power outage can cause failures fast. If your pump dies overnight in a warm room, roots can suffer in a short time, so check it often.
Light Leaks, Algae and Dirty Equipment
Light reaching your nutrient solution feeds algae, and dirty equipment harbors pathogens. Both make root rot more likely by competing for oxygen and spreading disease.
How Light Leaks Lead to Algae
Algae needs light and nutrients, and your reservoir has plenty of nutrients. If light gets in, algae will grow on walls, tubing and even roots.
Algae competes with roots for oxygen, especially at night. When it dies off, it decays and feeds bacteria and fungi in the water.
Use opaque reservoirs to block light. Clear or translucent containers are a common mistake, especially in beginner setups.
Finding and Fixing Light Leaks
Check your system for gaps where light can reach the solution. Common trouble spots include:
- Empty net pot holes in lids
- Gaps between the lid and reservoir
- Clear tubing or channels
- Translucent buckets or storage bins
- Cracks in reservoir lids
Cover empty holes with tape, a plug or an empty pot filled with media. Wrap clear containers in foil, duct tape or a dark cover.
Strong grow lights can make light leaks worse. If you’re picking a fixture, my roundup of the best grow lights for indoor plants can help you choose one that fits your space.
Why Clean Equipment Matters
Pathogens can survive on reservoirs, pumps, tubing, net pots and growing media. If you reuse gear without cleaning it, you carry problems into your next crop.
Biofilm, the slimy layer that forms on wet surfaces, is a common hiding spot. It can protect microbes and keep reinfecting plants.
Clean all parts between crops. That includes the reservoir, lids, air stones, air lines, pumps, net pots and any channels or trays.
Replace the solution every 1 to 2 weeks, and top off between changes. Old solution builds up imbalances and organic matter that can stress roots.
How to Treat Root Rot
To treat root rot, trim away damaged roots, clean and sanitize the system, refill with fresh solution and fix the conditions that caused it. Act quickly, because root rot spreads fast in shared water.
Step One: Remove and Trim Damaged Roots
Start by lifting affected plants out of the system. Work gently, since damaged roots break easily.
Use clean scissors to trim away brown, slimy roots. Cut back to firm, white or cream tissue whenever you can.
Rinse the remaining roots with clean water at the right temperature. Avoid harsh scrubbing, since healthy root tissue is delicate.
Sanitize your scissors between plants. That keeps you from spreading the problem from one plant to the next.
Step Two: Clean and Refill the System
Drain the reservoir completely and dump the old solution. Don’t try to save it, since it likely carries pathogens.
Scrub the reservoir and all parts to remove slime and biofilm. Then sanitize them with a hydroponic-safe cleaner, follow the label and rinse well before refilling.
Mix fresh nutrient solution using a complete hydroponic nutrient that includes calcium, magnesium and micronutrients. Regular garden fertilizer isn’t designed for this, so skip it.
Check and adjust pH to 5.5 to 6.5. Lettuce does well around 5.8 to 6.2. Adjust a little at a time with pH up or pH down, then recheck.

Step Three: Fix the Root Cause
Treatment won’t last if the conditions that caused it stay the same. Bring water temperature down into the 65 to 72°F range.
Add or improve aeration with an air pump and air stone. Make sure bubbles are steady and air lines aren’t kinked or clogged.
Some growers add beneficial microbes made for hydroponics after cleaning. These are optional, but they can help colonize roots and compete with harmful organisms.
Watch your plants closely for the next week. New white root tips are a great sign that the plant is recovering.
| Treatment Step | What to Do |
|---|---|
| Trim | Cut brown, |