
That pit you’re about to toss in the trash can grow into a leafy, glossy houseplant. Learning how to grow an avocado from a seed takes patience, but it’s simple, cheap and fun for kids and adults alike.
In this guide, I’ll walk you through each step. You’ll learn how to prep the pit, sprout it in water, move it to soil and keep it healthy. I’ll also be honest about whether you’ll ever get fruit.
Can You Really Grow an Avocado From a Seed?
Yes, you can grow an avocado plant from a pit you pulled out of a store-bought avocado. Most people grow it for its big, glossy leaves rather than for fruit.
Why It’s Such a Popular Project
An avocado seed is large, so it’s easy to handle and easy to watch. You can see the pit split, the root push down and the stem shoot up. Few plant projects are this visual.
It also costs almost nothing. You already bought the avocado, and the seed is a free bonus. A glass of water and a few toothpicks are all you need to start.
What You’ll Need
You only need a few basic supplies. Here’s my short list:
- One ripe avocado pit
- 3 or 4 sturdy toothpicks
- A clear glass or jar
- A bag of well-draining potting mix
- An 8 to 10 inch pot with drainage holes, such as a terracotta pot
I like an unglazed terracotta pot for avocados. It breathes and wicks extra moisture out of the soil, which helps protect the roots from rot. A plastic pot works too if you’re careful with watering.
What to Expect Along the Way
This isn’t a fast project at first. Sprouting can take a few weeks to a few months. Once the plant gets going, though, it grows quickly.
Not every pit will sprout. I suggest starting two or three seeds at once to improve your odds. That way, one slow seed won’t stall the whole project.
Preparing the Avocado Pit
Clean the pit gently, leave the brown skin on and figure out which end is up. Those three steps set your seed up to sprout.
Removing the Pit Safely
Cut the avocado lengthwise around the seed, then twist the halves apart. Scoop the pit out with a spoon rather than stabbing it with a knife. A knife can crack or nick the seed.
Try not to damage the pit while you remove it. A cut in the seed can let in mold and rot later on.
Washing Without Removing the Skin
Rinse the pit under lukewarm water and rub off all the green flesh with your fingers. Leftover flesh can grow mold in your water glass. A soft sponge helps with stubborn bits.

Don’t peel off the thin brown skin, called the seed coat. Leave it in place unless it flakes off on its own. It may loosen naturally as the seed sits in water, and that’s fine.
Finding the Top and Bottom
Every avocado pit has a top and a bottom. The wider, flatter end is the bottom, where roots grow. The narrower, pointier end is the top, where the shoot comes out.
Getting this right really matters. If you put the seed in upside down, it won’t sprout properly. Some pits are nearly round, so look closely for the slightly pointed tip.
| Part of the Pit | What It Looks Like | What Grows There |
|---|---|---|
| Bottom | Wider, flatter end | Roots |
| Top | Narrower, pointier end | Stem and leaves |
| Seed coat | Thin brown skin | Protects the seed |
The Toothpick and Water Method
The toothpick method suspends the bottom of the pit in water so you can watch it root. It’s the classic way to sprout an avocado, and it works well.
Setting Up the Pit
Push 3 or 4 toothpicks into the sides of the pit, spaced evenly around the middle. Angle them slightly downward. They act like little arms that hold the seed up.
Rest the toothpicks on the rim of a glass or jar. Fill the glass so the bottom inch or so of the pit sits in water. The top half should stay dry and out of the water.
A clear glass makes the process more fun. You can watch the roots form without disturbing the seed.
Where to Put the Glass
Place the glass in a warm, bright spot with indirect light. A spot near a window works well, as long as it isn’t in hot, direct sun. Strong sun can overheat the water and encourage algae.

Warmth helps the seed wake up. A cold windowsill in winter can slow sprouting a lot. Keep it somewhere you’ll see it every day so you remember to check the water.
Keeping the Water Fresh
Change the water every 5 to 7 days, or sooner if it looks cloudy. Fresh water keeps mold and bacteria away. Always top it back up so the base of the seed stays wet.
If you see slime or fuzz on the seed, rinse it gently and refill the glass with clean water. A little attention here prevents a lot of rot.
Watching for Signs of Life
First, the pit will dry on top and crack open. Then a taproot pushes out of the bottom. A shoot follows from the top after the root gets going.
This usually takes about 2 to 8 weeks, and sometimes up to 12. Be patient. Some seeds just never sprout, even with perfect care.
Planting the Sprouted Seed in Soil
Move the seedling to soil once the roots are thick and a few leaves have opened. A pot with drainage and a loose, well-draining mix give it the best start.

When It’s Ready to Pot
Look for a healthy root system and a stem with leaves. The roots should look thick and fill a good part of the glass. If you trimmed the stem (see the pruning section below), wait until it regrows leaves.
Don’t rush this step. A seedling with only a thin, short root may struggle in soil. A bit more time in water builds strength.
Choosing the Pot and Mix
Use an 8 to 10 inch pot with drainage holes. Avocado roots hate sitting in water, so drainage holes aren’t optional. A saucer underneath catches the runoff.
Fill it with a loose potting mix that drains well. Avoid garden soil or topsoil, since they pack down hard in pots. For more detail on mixes, see my guide to the best soil for growing plants.
If your mix feels heavy, stir in some perlite. It adds air space and helps water move through faster.
How to Plant It
Pull out the toothpicks gently. Make a hole in the mix big enough for the roots, and set the seed in place. Leave the top half of the seed above the soil line.
Firm the mix lightly around the roots and water well. Let the extra water drain out of the bottom. Then place the pot in a bright spot.
Planting Directly in Soil Instead
You can skip the water step and plant the pit straight in soil. Bury it with the pointed tip just above the surface. Keep the mix evenly moist but never soggy.
This method works fine, but you can’t watch the roots grow. Many people find it lower maintenance, since there’s no water to change.
Light, Water and Temperature
Avocados want lots of bright light, careful watering and warm temperatures. Get these three right, and your plant will grow fast.
Giving It Enough Light
Give your avocado at least 6 hours of bright light a day. A sunny south-facing window is ideal for most US homes. East or west windows can work, but growth may be slower.
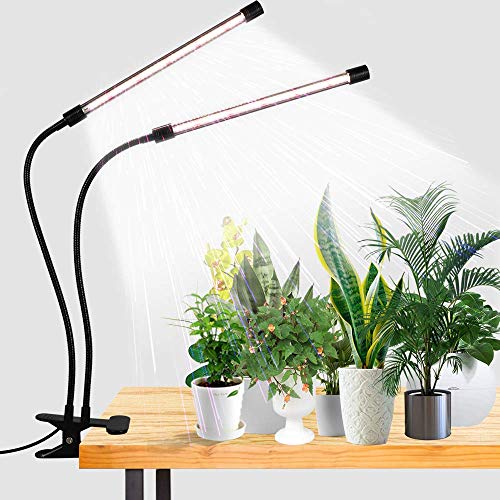
Winter days are short and dim, especially up north. A grow light keeps the plant from getting leggy. My guide to the best grow lights for indoor plants can help you pick one.
Rotate the pot every week or two. That keeps the stem growing straight instead of leaning toward the window.
Watering the Right Way
Water when the top inch or two of soil feels dry. Push a finger into the mix to check. If it’s still damp, wait a few more days.
Soggy soil is the biggest danger. It rots roots fast. When you do water, soak the pot until water runs out of the drainage holes, then empty the saucer.
Every few months, flush the pot by running plain water through it for a minute. This rinses away salts from tap water and fertilizer that can burn leaf tips.

Keeping It Warm
Avocados like temperatures between 60 and 85°F. Keep them above about 45°F at all times. Cold drafts from doors or windows can damage the leaves.
Avocados are only hardy outdoors in USDA zones 9 to 11. Some cold-hardy varieties handle drops to about 20°F. Everywhere else, keep your plant indoors through fall and winter.
In summer, you can move the pot outside to a sheltered spot. Ease it into the sun over a week or two so the leaves don’t scorch.
| Need | What Avocados Like | Watch Out For |
|---|---|---|
| Light | 6+ hours of bright light | Leggy growth in low light |
| Water | When top 1 to 2 inches are dry | Soggy soil and root rot |
| Temperature | 60 to 85°F | Anything below about 45°F |
| Humidity | Average indoor air or higher | Crispy tips in very dry air |
Feeding Your Avocado
Feed your avocado with a balanced fertilizer every 4 to 6 weeks in spring and summer. Skip feeding in winter, when growth slows. For a fuller schedule, read my guide on how often to fertilize indoor plants.
Wait until a newly potted seedling settles in and starts growing before you feed it. Fresh potting mix often has enough nutrients for the first several weeks.