
Few winter projects are as easy or as rewarding as growing paperwhite bulbs indoors. You set them in a bowl, add water, and a few weeks later you have clusters of white, starry flowers filling the room with fragrance.
In this guide, I’ll walk you through every step. We’ll cover picking good bulbs, choosing a growing method, timing your planting for the holidays, keeping stems from flopping, and what to do once the show is over.
Choosing Healthy Paperwhite Bulbs
Choose bulbs that feel firm and heavy for their size, with no soft spots, mold or shriveled areas. Bigger bulbs usually send up more flower stems, so they are worth a little extra money.
What Paperwhites Actually Are
Paperwhites are tender relatives of the daffodil. Botanically they are Narcissus papyraceus, and you’ll often see them sold as Narcissus tazetta types, such as the popular variety ‘Ziva’.
Unlike tulips, hyacinths and most spring bulbs, paperwhites need no cold chilling before they bloom. That one trait makes them the easiest bulbs you can grow indoors.
Outdoors, they are only hardy in USDA zones 8 to 11. In colder regions, they are grown almost entirely as indoor winter bulbs.
How to Spot a Good Bulb
When you shop, pick up each bulb and give it a gentle squeeze. A healthy paperwhite bulb feels solid, like a small onion.
Here’s what to look for and what to skip:
- Firm texture: No mushy or hollow spots anywhere on the bulb.
- Good weight: Heavy bulbs are full of stored energy for flowering.
- Clean surface: Skip bulbs with blue-gray or white fuzzy mold.
- Intact base: The flat bottom, where roots emerge, should be dry and firm.
- Size: Larger bulbs generally produce more flower stalks.
A little loose, papery skin is normal. Don’t worry if some of the outer tunic flakes off.
If a bulb has a green shoot already peeking out, that’s fine too. It just means it’s ready to grow.
Supplies to Gather Before Planting
Before you plant, decide how you’ll grow them, then gather your supplies. Two items I find especially useful are a good potting mix and a terracotta pot.
A light, well-drained potting mix works well if you prefer growing in soil. If you need help choosing one, my guide to the best soil for indoor plants explains what to look for.
A terracotta pot is a great choice for soil-grown paperwhites. The clay breathes and helps excess moisture escape, which reduces the risk of rot.

If you’d rather grow in water, you’ll need a watertight bowl or vase plus pebbles, gravel or glass beads. I’ll cover those options next.
Gravel, Water or Soil: Picking a Growing Method
Paperwhites grow happily in pebbles, gravel, glass beads or a well-drained potting mix. Gravel and water make the prettiest display, while soil is a bit more forgiving with moisture.

Growing in Pebbles, Gravel or Glass Beads
This is the classic method for paperwhite bulbs indoors. The bulbs sit on a bed of stones, and the roots grow down into water held in the bottom of the container.
The key rule is simple. Keep the water level just touching the base of the bulbs, never covering them. Bulbs that sit submerged will rot.
I like this method because you can see the roots and water level, especially in a clear glass container. It’s easy to check at a glance.
Growing in Potting Mix
Soil works just as well as stones. Fill your pot with a well-drained potting mix, set the bulbs in place, and keep the mix evenly moist but not soggy.
Soil gives the roots more grip, so stems may stand up a little better. It also holds moisture longer, so you won’t need to top it off quite as often.

The main risk is overwatering. Soggy soil invites rot, which is why a pot with a drainage hole matters.
Comparing the Methods
Here’s a side-by-side look to help you decide.
| Method | Best For | Watering Tip | Main Risk |
|---|---|---|---|
| Pebbles or gravel | Classic look, easy setup | Keep water just touching the bulb base | Rot if bulbs sit in water |
| Glass beads | Decorative clear vases | Same as gravel; check level often | Rot if overfilled |
| Potting mix | Sturdier roots, gift pots | Evenly moist, never soggy | Rot from overwatering |
My advice: if you’re new to paperwhites, try gravel in a clear container. Watching the roots form is part of the fun.
Containers and Planting Depth
Use a container at least 3 to 4 inches deep, set bulbs pointed end up and shoulder to shoulder, and bury them about one-third of their height. The top two-thirds of each bulb should stay exposed.
Picking the Right Container
Almost any container works if it’s deep enough. Bowls, vases, decorative pots and old casserole dishes can all hold paperwhites.
For gravel or water, the container must be watertight. For soil, choose a pot with a drainage hole, or be very careful with watering.
Shallow, wide bowls make a lush display because you can pack in many bulbs. Taller vases can also help support stems as they grow.
How Deep and How Close to Plant
Paperwhites don’t need deep planting like outdoor bulbs. You only bury about one-third of each bulb, leaving the shoulders and tips exposed.
Pack them shoulder to shoulder. Crowding is good here. The bulbs support each other, and a full container looks far more impressive.
Here’s a simple step-by-step:
- Add 2 to 3 inches of gravel or potting mix to the container.
- Set the bulbs pointed end up, close together.
- Add more gravel or mix around them until about one-third of each bulb is covered.
- Add water to just below the base of the bulbs in gravel, or water the soil until evenly moist.
Indoor Planting vs. Outdoor Bulb Planting
Forcing paperwhites is quite different from planting bulbs in the garden. Outdoor bulbs go much deeper and need winter cold.

If you’re also planting in the yard this season, my guide on how to plant fall bulbs covers depth and timing for outdoor beds. Small early bloomers have their own needs, too, so check my notes on crocus bulbs planting.
The short version: paperwhites stay shallow, cozy and indoors. Most other spring bulbs go deep and outside.
When to Plant for Holiday Blooms
For a holiday display, plant paperwhites in early to mid-November. They bloom about 4 to 6 weeks after planting, which lines up nicely with December celebrations.
Understanding the Timeline
Paperwhites follow a fairly predictable schedule. Roots form first, usually within 1 to 2 weeks of planting.
After that, green shoots rise quickly. Flower buds appear on top of the stems, and blooms open around 4 to 6 weeks after you planted.
The flowers last about 1 to 2 weeks. They’ll last longer in a cool room and fade faster in a warm one.
| Stage | Approximate Timing After Planting |
|---|---|
| Roots form | 1 to 2 weeks |
| Shoots reach 1 to 2 inches | About 2 weeks |
| Flower buds appear | 3 to 5 weeks |
| Blooms open | 4 to 6 weeks |
| Bloom lasts | 1 to 2 weeks |
Planting in Batches for Continuous Bloom
One container of paperwhites is lovely, but a few staggered batches are even better. Plant a new batch every 2 weeks from October through January.
That way, as one group fades, the next one is opening. You can have fragrant flowers indoors for much of the winter.
Store your unplanted bulbs in a cool, dry, dark spot until it’s their turn. Keep them in a paper bag or mesh bag, not plastic, so they don’t get damp.
Timing Tips for Gifts
Paperwhites make wonderful holiday gifts. A pot planted in early November can be wrapped and handed over just as buds appear.
Gifting them in bud is smart. The recipient gets to enjoy the full bloom, and the stems are less likely to break in transit.
Light and Temperature for Sturdy Stems
Paperwhites grow best in bright, indirect light with temperatures between 50 and 65°F. Warm rooms and low light cause tall, weak stems that tip over.
Finding the Right Light
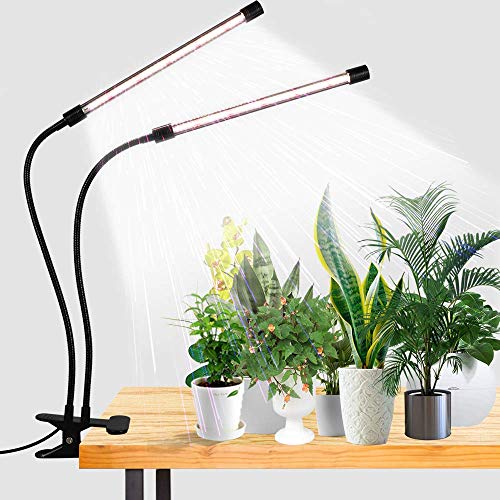
Bright, indirect light keeps stems compact. A spot near a sunny window, but not baking in hot direct sun, is ideal.
If light is too low, stems stretch toward the window and get lanky. Turn the container every few days so the stems grow straight instead of leaning.
During the root-forming stage, light is less critical. Once green shoots app