
Tomatoes are only as good as the soil they grow in. Healthy roots mean strong plants, steady fruit, and fewer problems like cracking or blossom end rot.
The best soil for tomatoes is loose, fertile, and well-drained, and the right mix depends on where you’re planting.
In this guide, I’ll cover what tomato roots need and how to set up soil in pots, raised beds, and in-ground beds. I’ll also explain pH, fertilizer, and how to handle your soil once the season ends.
What Tomato Roots Need From Soil
Tomato roots need loose, fertile soil that drains well but still holds steady moisture. They also do best in slightly acidic soil, with a pH between about 6.2 and 6.8.
Loose Texture and Good Drainage
Tomato roots spread wide and deep when they have room. Heavy, compacted soil keeps them shallow and short on air.
Good drainage matters just as much. Roots sitting in soggy soil can rot, and the plant can’t take up water or nutrients properly. You want soil that soaks up water quickly and doesn’t stay waterlogged.
Here’s what loose, healthy tomato soil looks like:
- Dark and crumbly when moist
- Easy to dig with a hand trowel
- Water soaks in instead of pooling on top
- No hard crust after it dries
Steady Moisture and Nutrients
Tomatoes are heavy feeders. They need a steady supply of nutrients from planting through the last harvest.
They also need even moisture. Soil rich in organic matter holds water like a sponge and releases it slowly. That steady supply helps prevent cracked fruit and blossom end rot.
Compost is the easiest way to get both. It feeds the soil, improves texture, and helps hold moisture without making soil soggy.
Tools That Help From the Start
Two basic items make tomato soil much easier to get right. My advice is to pick up a home soil test kit and a quality potting mix.
A home soil test kit tells you your soil’s pH and gives you a rough read on nutrients. That way, you know what to fix before planting instead of guessing.
A quality potting mix is a must if you grow tomatoes in containers. Look for a light, fluffy all-purpose potting mix that drains well. Avoid anything labeled as topsoil or garden soil for pots.
| Soil Need | Why It Matters | How to Get It |
|---|---|---|
| Loose texture | Lets roots spread and breathe | Compost, perlite, less foot traffic |
| Good drainage | Prevents root rot | Raised beds, perlite, organic matter |
| Steady moisture | Prevents cracking and blossom end rot | Compost, mulch, regular watering |
| Fertility | Feeds heavy-feeding plants | Compost, tomato fertilizer |
| pH 6.2 to 6.8 | Keeps nutrients available | Soil test, lime or sulfur if needed |
Best Soil for Tomatoes in Pots
The best soil for tomatoes in pots is a light, quality potting mix, never garden soil. A good homemade blend is roughly equal parts compost, potting mix, and perlite or coco coir.

Why Garden Soil Fails in Containers
Garden soil seems like a free and easy choice. But in a pot, it packs down hard and drains poorly.
In the ground, worms and roots keep soil loose. In a container, that doesn’t happen the same way. The soil compacts, roots run short on air, and water sits at the bottom.
Garden soil can also carry weed seeds, pests, and disease into your pot. A clean potting mix gives your tomato a fresh, healthy start.
A Simple Tomato Potting Mix
You can use a quality all-purpose potting mix straight from the bag. Or you can mix your own for better nutrients and moisture.
Here’s the simple recipe I recommend:
- 1 part compost for nutrients and soil life
- 1 part all-purpose potting mix for structure
- 1 part perlite or coco coir for drainage and moisture balance
Perlite adds air and drainage. Coco coir holds moisture and rewets easily. If your pots dry out fast in hot sun, lean toward coco coir.
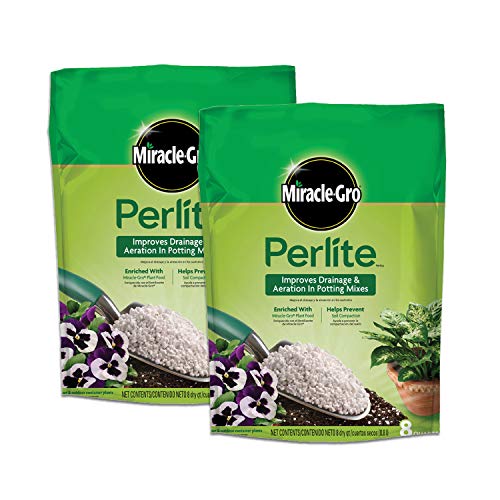
Mix everything in a wheelbarrow or large tub. Moisten it lightly as you go, since dry mix can be hard to wet later.
If you’d like to make your compost too, my guide to making organic soil at home walks you through it step by step.
Pick the Right Pot Size
Pot size matters as much as the mix. A small pot dries out fast and can’t hold enough soil to feed a big plant.
My advice is to use at least 5 gallons for determinate tomatoes. These are bushier types that stop growing at a certain height. Indeterminate tomatoes keep growing all season, so give them 10 gallons or more.
Make sure every pot has drainage holes. No mix can save a tomato sitting in standing water.
| Tomato Type | Growth Habit | Minimum Pot Size |
|---|---|---|
| Determinate | Bushy, stops at a set height | 5 gallons |
| Indeterminate | Vining, grows all season | 10 gallons or more |
| Dwarf or patio | Compact | 5 gallons |
Container tomatoes use up nutrients quickly because they have limited soil. Plan to feed them regularly once fruit sets. If you’re working with a small space, my guide to growing tomatoes on a balcony has more tips for containers.
Best Soil for Tomatoes in Raised Beds
For raised beds, fill at least 12 inches deep with half topsoil and half compost. This mix drains well, holds moisture, and gives tomato roots plenty of room.

The Basic Raised Bed Recipe
Raised beds warm up faster in spring and drain better than flat ground. That makes them a great fit for tomatoes.
Here’s the simple formula:
- 50% quality topsoil for structure and minerals
- 50% compost for nutrients and moisture
You can also buy a premixed raised-bed mix. Just check that it feels loose and crumbly, not dusty or heavy. Many bagged raised-bed mixes do well with a little extra compost mixed in.
Avoid filling raised beds with pure potting mix. It’s expensive at that volume and can dry out and break down too fast.
Depth and Drainage
Tomatoes need at least 12 inches of good soil. Deeper is even better, since tomato roots can reach well beyond that.
If your bed sits on top of native soil, loosen the ground underneath before filling. This lets roots grow down past the bed and helps water drain away.
If your bed sits on concrete or a patio, aim for more depth. The roots have nowhere else to go, so the bed needs to hold enough soil on its own.
Using Compost Wisely
Not all compost is the same. Homemade compost, leaf mold, and aged manure all work well in raised beds.
Mushroom compost can work too, but it tends to be high in salts. Learn more about using mushroom compost in the vegetable garden before you spread a lot of it under your tomatoes.
If your raised bed uses tight grid planting, check out the best soil mix for square foot gardening. It’s a slightly different blend designed for closely spaced crops.
| Raised Bed Ingredient | Amount | Purpose |
|---|---|---|
| Topsoil | About 50% | Structure and minerals |
| Compost | About 50% | Nutrients, moisture, soil life |
| Aged manure (optional) | Small amount mixed in | Extra nutrients |
| Leaf mold (optional) | Small amount mixed in | Moisture holding |
Top up your raised beds with fresh compost each spring. Soil settles and breaks down over time, so you’ll often need to add a couple of inches.
Preparing In-Ground Soil for Tomatoes
To prepare in-ground soil, loosen it 8 to 12 inches deep and mix in 2 to 3 inches of compost. Then plant deep and finish with mulch.

Loosen and Amend the Soil
Start by clearing weeds, grass, and debris from your planting area. Then loosen the soil with a garden fork or spade.
Work the soil 8 to 12 inches deep. This gives tomato roots room to spread out early in the season.
Next, spread 2 to 3 inches of compost over the area. Mix it into the loosened soil. This improves texture, adds nutrients, and helps hold moisture.
Only work soil when it’s moist, not soaking wet. Digging wet soil, especially clay, can leave it hard and clumpy. For a full walkthrough, see my guide on preparing soil for a vegetable garden.
Fixing Clay and Sandy Soil
Your native soil type affects how much work you’ll need to do. A simple squeeze test helps you figure it out.
Grab a handful of moist soil and squeeze it. If it falls apart right away, it’s sandy. If it forms a sticky ball, it’s clay. If it holds together and then crumbles, you have loam.
- Clay soil: Add extra compost every year. Consider a raised bed or mound if drainage is very poor.
- Sandy soil: Add compost and leaf mold to help hold water and nutrients.
- Loam: Keep it healthy with yearly compost and mulch.
Don’t add sand to clay soil. It can make the texture worse. Organic matter is the real fix. My guide to improving garden soil covers more ways to handle tricky soil.
Plant Deep and Mulch Well
Tomatoes have a special trick. They can grow roots all along their buried stems.
When you plant, bury the stem deep. Remove the lower leaves and set the plant so only the top few sets of leaves sit above the soil. Those buried stems will grow extra roots, giving you a stronger plant.
If the plant is tall and leggy, you can dig a shallow trench and lay the stem sideways. The tip will turn upward toward the sun in a few days.
After planting, spread 2 to 3 inches of mulch around the plant. Mulch keeps moisture steady, keeps weeds down, and prevents soil from splashing onto lower leaves.
Good mulches for tomatoes include:
- Straw (not hay, which often has seeds)
- Shredded leaves
- Grass clippings from untreated lawns, spread thin
Keep mulch a couple of inches away from the stem to prevent rot.
Testing and Adjusting Soil pH
Tomatoes grow best in soil with a pH of about 6.2 to 6.8. Test your soil every 2 to 3 years and adjust slowly if it’s outside that range.

How to Test Your Soil
A home soil test kit is the easiest way to check pH. Most kits give you results in minutes.
For an accurate reading, take soil from several spots in your bed. Dig about 4 to 6 inches down, mix the samples together, and test from that blend.
Fall or early spring is the best time to test. That gives you time to make changes before planting.
For pots, you usually don’t need to test every year. Fresh potting mix is typically balanced for vegetables right out of the bag.
Raising or Lowering pH
If your so