
Garlic is one of the most rewarding crops you can grow, and it asks for very little once it’s in the ground.
Learning how to plant garlic in fall is the key step, because the cloves you tuck in now become full, fat bulbs by next summer.
In this guide, I’ll walk you through timing, choosing the right type, preparing your bed, and planting each clove. I’ll also cover winter mulch, spring care, scapes, harvest, and curing, so your garlic stores well for months.
Why Fall Is the Best Time to Plant Garlic
Fall planting gives garlic time to grow roots before winter and the cold it needs to form bulbs. Plant about 4 to 6 weeks before your ground freezes, and the cloves will be ready to grow fast in spring.
Garlic Needs Cold to Form Bulbs
Garlic is a little different from most vegetables. Each clove needs a long stretch of cold to divide into a full head of separate cloves.
Without enough chill, you often end up with a single round bulb instead of a divided head. It’s still edible, but it’s not the harvest you want.
Fall planting handles this for you. The cloves sit through winter, get their cold treatment naturally, and wake up ready to bulb in spring.
Roots Grow Before the Ground Freezes
Once planted, garlic starts sending out roots within a few weeks. Those roots anchor the clove and let it start feeding before the soil freezes hard.
A clove with a strong root system in fall jumps ahead in spring. It greens up early and has more time to build leaves, which feed the bulb.
My advice is to get your cloves in on time and let them settle. Here are the two things I’d have ready before planting day:
- Seed garlic bulbs. These are sold specifically for planting and are your starting stock.
- Straw mulch. A bale of clean, seed-free straw protects your garlic through winter.
When to Plant in Your Region
In most of the US, garlic goes in from October to early November. Gardeners in the far north plant earlier, and Southern gardeners can plant as late as December.
| Region | Typical Planting Window |
|---|---|
| Far north and northern mountains | Late September to mid-October |
| Midwest and Northeast | Mid-October to early November |
| Pacific Northwest | Late October to early November |
| South and mild coastal areas | November to December |
Your local first freeze matters more than the calendar. Count back 4 to 6 weeks from when your ground usually freezes, and you’ll land in the right window.
Plant too early and green tops can push up and get damaged by hard frost. Plant too late and roots don’t have time to settle in, which means smaller bulbs. Even so, a few weeks late is better than waiting until spring.
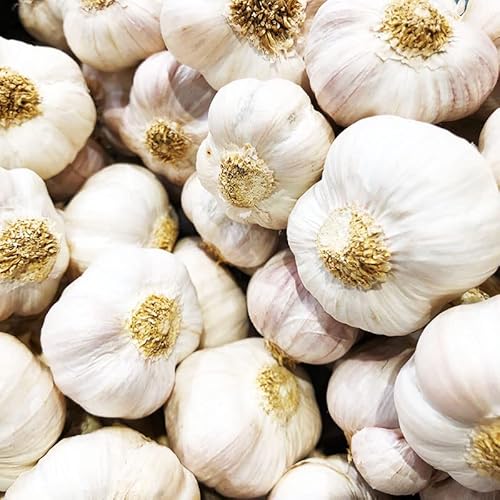
Hardneck vs. Softneck Garlic
Hardneck garlic is best for cold winters and makes edible scapes, while softneck garlic suits mild winters and stores the longest. Pick the type that matches your climate first, then choose a variety you like.
Hardneck Garlic for Cold Winters
Hardneck garlic thrives where winters are long and cold. It grows a stiff center stalk, which is where it gets its name.
In late spring, hardnecks send up a curly flower stem called a scape. Scapes are a bonus crop with a mild garlic flavor.
Hardneck bulbs usually have fewer, larger cloves that peel easily. Many gardeners love their bold, rich flavor. The tradeoff is a shorter storage life than softnecks.
Softneck Garlic for Mild Winters
Softneck garlic does well where winters are milder. It needs less cold to form good bulbs, which makes it the go-to choice across much of the South and West Coast.
Softnecks don’t make scapes. Their soft stems flop over when mature, and you can braid them for storage.
Each bulb holds more cloves, though they’re usually smaller. Softnecks also store the longest, which makes them a great pick if you want garlic well into winter and spring.
Which Type Should You Grow?
Match the type to your winters. If your ground freezes solid for weeks, go with hardneck. If your winters are mild, softneck is the safer bet.
| Feature | Hardneck | Softneck |
|---|---|---|
| Best climate | Cold winters | Mild winters |
| Cloves per bulb | Fewer, larger | More, smaller |
| Scapes | Yes | No |
| Storage life | Shorter | Longest |
| Braidable | No | Yes |
Elephant garlic is actually closer to a leek and needs much wider spacing, so I’d stick with true garlic if space is tight. Gardeners in the middle zones can grow both types and compare them side by side.
Choosing and Preparing Seed Garlic
Start with seed garlic from a nursery or seed catalog, and plant the biggest, healthiest cloves. Break the heads apart just before planting so the cloves stay fresh.

Why Seed Garlic Beats Grocery Garlic
Seed garlic is grown and sold for planting. It’s chosen for good growth in home gardens and is checked for disease.
Grocery garlic is grown for eating. It may be treated to stop sprouting, and it can carry diseases into your soil. It also may come from a climate very different from yours.
That’s why I always recommend buying seed garlic. One healthy head can give you several plants, and you can save your best bulbs to replant next fall.
Breaking Heads Into Cloves
Wait until a day or two before planting to separate your cloves. Once broken apart, cloves start to dry out, and the root area can get damaged.
Hold the bulb in both hands and gently pull it apart. Try to keep the papery skin on each clove, since it helps protect it in the soil.
Don’t peel the cloves. A little loose outer wrapper is fine to remove, but leave the clove’s own skin in place.
Picking the Best Cloves
Big cloves grow big bulbs. This is one of the simplest rules in garlic growing, and it really matters.
Sort your cloves before planting:
- Keep the largest, firmest cloves for planting.
- Toss any that are soft, moldy, shriveled, or bruised.
- Set aside the small inner cloves for cooking.
- Look for a clean, intact root plate on the flat end.
If you’re working with softneck garlic, you’ll notice the inner cloves are quite small. Those are better in the kitchen than in the garden.
Preparing the Bed
Garlic needs full sun, well-drained soil rich in compost, and a pH between 6.0 and 7.0. A little prep before planting pays off for the whole long season.

Pick a Sunny, Well-Drained Spot
Choose a spot that gets at least 6 to 8 hours of direct sun a day. Garlic leaves feed the bulb, so more sun means bigger heads.
Drainage is just as important. Garlic sits in the ground all winter, and cloves rot in soil that stays soggy.
Raised beds are a great fix for heavy clay. If you’re planting in a small bed, my guide to growing garlic in a square foot garden shows how to fit nine cloves into each square.
Add Compost and Check pH
Before planting, pull any weeds and old roots. Then work 2 to 3 inches of compost into the top several inches of soil.
Compost feeds the soil and helps it drain while still holding moisture. It also keeps the bed loose, so bulbs can swell without fighting hard ground.
Garlic likes a pH between 6.0 and 7.0. A simple soil test tells you where you stand. For a full walkthrough of testing, loosening, and amending, see my notes on preparing soil for a vegetable garden.
Rotate Your Garlic Bed
Don’t plant garlic where garlic, onions, leeks, or shallots grew recently. Rotate onion family crops so they return to the same spot only every 3 years.
Rotation helps keep soil diseases and pests from building up. It’s one of the easiest ways to protect your future harvests.
Keep in mind that white rot is a serious soil disease that can linger for many years. Rotation alone won’t clear it, so the best defense is planting clean seed garlic and never moving soil from an infected bed.
How to Plant Garlic in Fall, Step by Step
Plant each clove pointed end up, 2 inches deep, 4 to 6 inches apart, in rows 12 inches apart. In cold zones, go a little deeper for extra protection.
Spacing and Depth
Good spacing gives each bulb room to grow. Here’s a quick reference:
| Measurement | Recommendation |
|---|---|
| Depth (most zones) | 2 inches to the tip |
| Depth (cold zones) | 3 to 4 inches |
| Spacing between cloves | 4 to 6 inches |
| Spacing between rows | 12 inches |
Closer spacing fits more plants in a bed. Wider spacing, toward 6 inches, can give larger bulbs, especially with big hardneck varieties.
Deeper planting in cold zones helps insulate cloves from hard freezes. It also reduces the chance of frost heaving them out of the soil.
Planting Each Clove
Planting garlic is fast once your bed is ready. Here’s how I’d do it:
- Mark your rows 12 inches apart with a string or the edge of a board.
- Use a finger, dibber, or trowel to make holes 4 to 6 inches apart.
- Drop one clove into each hole, flat root end down and pointed tip up.
- Cover each clove so the tip sits about 2 inches below the surface, or 3 to 4 inches in cold zones.
- Firm the soil gently with your hand to remove air pockets.
Getting the clove upright matters. A clove planted upside down will usually still grow, but it wastes energy turning around and may end up smaller.
Label your rows if you plant more than one variety. It’s easy to forget which is which by next summer.
Water After Planting
Water the bed well after planting to settle the soil around the cloves. This helps roots get started quickly.
After that, only water in fall if the weather turns dry. Garlic roots are growing before winter, so the soil should be lightly moist, not wet.
If you get regular fall rain, you likely won’t need to water at all. Too much water in cool weather is a bigger risk than too little.
Mulching and Winter Care
Once the ground starts to freeze, cover your garlic with 4 to 6 inches of straw or shredded leaves. Mulch protects the cloves through winter and keeps the soil steady.