
Every week, a lot of good organic material leaves the average American home in a trash bag. Coffee grounds, carrot peels, fallen leaves and lawn clippings can all become rich, dark compost instead.
If you’ve been wondering how to start composting at home, the good news is that it’s simpler than most people think.
In this guide, I’ll walk you through what goes in, what stays out, which bin to choose and how to build your first pile. I’ll also cover hot and cold methods, fixing common problems and using the finished product.
My advice is to start small, keep it simple and let nature do most of the work.
Why Compost at Home
Composting at home turns kitchen and yard waste into free, nutrient-rich soil food. It also cuts the amount of trash you send to the landfill.
Less Waste in the Landfill
Food scraps and yard trimmings make up a large share of what Americans throw away, according to the EPA. When that material sits in a landfill, it breaks down without much oxygen. That process releases methane, a potent greenhouse gas.
Composting at home keeps that material out of the trash. It’s one of the easiest habits to adopt if you’re interested in zero-waste gardening. Other habits include using leaves as mulch, saving seeds and collecting rainwater.
Better Soil for Free
Finished compost feeds the soil life that feeds your plants. It helps sandy soil hold water and helps heavy clay soil drain. It also adds slow-release nutrients and organic matter.
Bagged compost costs money, and you never quite know what’s in it. When you make your own, you control the ingredients. Compost is also the foundation of making organic soil at home, alongside aged manure, leaf mold and worm castings.
Helpful Tools to Get Started
You don’t need much gear, but two products make the job easier. A countertop compost bin with a lid sits by the sink and collects scraps between trips outside. Look for one that’s easy to wash, and empty it every few days.

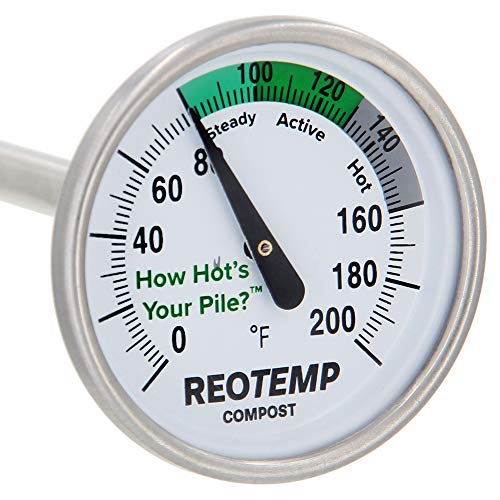
A compost thermometer is the second tool I’d recommend. It has a long metal probe you push into the center of the pile. It tells you whether your pile is actually heating up, which takes the guesswork out of hot composting.
- Countertop compost bin: collects daily kitchen scraps
- Compost thermometer: measures the pile’s internal heat
- Pitchfork or garden fork: for turning the pile
- Hose or watering can: for adjusting moisture
What Can and Cannot Go in Compost
Compost needs a mix of “browns” (dry, carbon-rich materials) and “greens” (moist, nitrogen-rich materials). Some items, like meat, dairy and pet waste, should always stay out.
Browns: The Carbon Side
Browns are dry, often brown or tan materials. They provide carbon, create air pockets and soak up excess moisture. Without enough browns, a pile turns slimy and smelly.

- Dry leaves
- Straw
- Shredded cardboard
- Shredded paper and newspaper
- Small twigs and wood chips (they break down slowly)
Fall leaves are the best brown you can get. I suggest bagging a few extra in autumn so you have a supply all year.
Greens: The Nitrogen Side
Greens are fresh, moist materials. They provide nitrogen, which feeds the microbes that do the decomposing. Greens are what make a pile heat up.
- Vegetable and fruit scraps
- Coffee grounds and paper filters
- Fresh grass clippings
- Fresh plant trimmings
- Tea leaves
Note that “green” refers to nitrogen content, not color. Coffee grounds are brown, but they count as a green.
What to Keep Out
Some materials attract pests, create odors or carry problems back into your garden. Keep these out of a home compost pile.
| Keep Out | Why |
|---|---|
| Meat, fish and bones | Attract rodents, raccoons and flies; create odors |
| Dairy products | Smell bad and attract pests |
| Oils and greasy foods | Slow decomposition and attract pests |
| Dog or cat waste | Can carry harmful parasites and pathogens |
| Diseased plants | Diseases may survive and spread |
| Weeds gone to seed | Seeds can survive and sprout in your beds |
| Treated wood | Contains chemicals you don’t want in soil |
When in doubt, leave it out. A clean pile with simple ingredients is much easier to manage.
Choosing a Bin or Pile
The best setup depends on your space, your budget and how much material you have. An open pile works for big yards, while bins and worm systems suit smaller spaces.

Open Piles
An open pile is just a heap on bare ground. It costs nothing and is easy to turn. It works best if you have a lot of yard waste and a corner away from the house.
The downside is looks and pests. Open piles can look messy, and animals may dig through them. If you go this route, bury kitchen scraps in the center and keep them out of sight.
Enclosed Bins and Tumblers
Enclosed bins keep things tidy and discourage critters. You can build one from wire fencing, wood pallets or cinder blocks. You can also buy plastic bins with lids and vents.
Tumblers are barrels on a frame that you spin to mix the contents. They make turning easy and keep pests out. However, they hold less material, so they rarely get as hot as a large pile.
| Option | Best For | Pros | Cons |
|---|---|---|---|
| Open pile | Large yards | Free, easy to turn, holds a lot | Messy look, pests |
| Wire or pallet bin | Most yards | Cheap, tidy, good airflow | Turning takes effort |
| Plastic bin | Suburban yards | Neat, pest-resistant | Harder to turn |
| Tumbler | Small yards | Easy mixing, pest-proof | Small batches, less heat |
| Worm bin | Apartments, indoors | Compact, no yard needed | Needs care, limited capacity |
Worm Bins for Small Spaces
A worm bin uses red wiggler worms to eat kitchen scraps. It’s a good choice for apartments, condos or anyone without a yard. Worm bins work indoors, under a sink or in a closet.
The worms produce castings, a rich soil amendment. If you’re comparing amendments, my guide on worm castings vs. mushroom compost explains how they differ.
Building Your First Pile
Build your pile by layering browns and greens at about 2 to 3 parts browns to 1 part greens by volume. Keep everything as moist as a wrung-out sponge.
Pick the Right Spot
Choose a level, well-drained spot that’s easy to reach from the kitchen. Partial shade helps keep the pile from drying out too fast in summer. Avoid placing it right against wooden fences or your house.
Setting the pile directly on soil lets worms and microbes move in from below. If you worry about rodents, put hardware cloth under the bin first.
Layer Browns and Greens
This is the heart of how to start composting at home. Start with a few inches of coarse browns, like small twigs or straw, on the bottom. This helps air flow up through the pile.
Next, add layers of greens and browns. Aim for about 2 to 3 buckets of browns for every bucket of greens. You don’t need to be precise; it’s a rough guide, not a recipe.
- Bottom layer: coarse browns for airflow
- Middle layers: alternate greens and browns
- Top layer: browns to cover scraps and reduce flies and odors
Chop or shred big items before adding them. Smaller pieces break down faster because microbes have more surface to work on.
Get the Moisture Right
Moisture matters as much as the mix. Your pile should feel like a wrung-out sponge: damp, but not dripping. Squeeze a handful and you should get a drop or two of water at most.
Water each dry layer lightly as you build. In rainy climates, a lid or tarp keeps the pile from getting soggy. In dry climates, check moisture often, especially in summer.
Hot vs. Cold Composting
Hot composting is faster and kills more weed seeds, but it takes more effort. Cold composting is slow and low-maintenance, which suits many busy gardeners.
How Hot Composting Works
A hot pile needs to be at least 3 by 3 by 3 feet to hold its heat. With the right mix and moisture, the center reaches 130 to 160°F. That heat comes from microbes breaking down material quickly.
Turn the pile every 1 to 2 weeks to add oxygen and move outer material into the hot center. This is where a compost thermometer earns its keep. When the temperature drops, it’s usually time to turn.

A well-managed hot pile can be finished in about 2 to 6 months. It’s the best choice if you want compost fast or have a lot of material at once.
How Cold Composting Works
Cold composting means adding material as you get it and letting it sit. You turn it rarely, if ever. Decomposition still happens, just more slowly.
A cold pile takes about 6 to 12 months or longer to finish. It doesn’t get hot enough to reliably kill weed seeds or diseases. That’s one more reason to keep seeded weeds and sick plants out.
Which Method Fits You
Here’s a side-by-side look to help you decide.
| Feature | Hot Composting | Cold Composting |
|---|---|---|
| Pile size | At least 3 x 3 x 3 feet | Any size |
| Temperature | 130 to 160°F | Near outdoor temperature |
| Turning | Every 1 to 2 weeks | Rarely or never |
| Time to finish | About 2 to 6 months | About 6 to 12+ months |
| Effort | Higher | Low |
| Kills weed seeds | More reliably | Not reliably |
My advice for beginners is to start cold and get comfortable. Once you understand the browns-to-greens balance, try building a hot pile.
Troubleshooting Smells and Slow Piles
Most compost problems come down to balance, moisture or air. An ammonia smell means too many greens, a rotten smell means too wet or packed, and a slow pile is usually too dry or has too many browns.
Ammonia or Rotten Smells
A healthy pile smells earthy, like a forest floor. A sharp ammonia smell means you have too many greens. Fix it by mixing in a generous amount of dry browns, like shredded cardboard or leaves.
A rotten-egg or sour smell means the pil